Setup compilers
In the previous section of this writeup, we did a full dry-run of the iBoot exploit using iloader and we could see how the expected output looks like. If we want to port this exploit setup to a different target such as another device with a different vulnerable iBoot, we have to do a lot of addresses (or offsets) ajustments in the iloader toolkit source code until we can get the bootloader to run there, at least resonably enough. Only for that, it's highly possible that you will have to compile iloader source multiple times because there is so much adjustements to make that it's unlikely probable that everything will work at the first iloader compilation. Once we can successfully dry run the bootloader, we must adjust the environment (iBoot NVRAM, HFS+ B-Tree headers) to run the exploit and find where is the unsigned code execution address in our hacked disk image. That part is most likely trials an errors, this will require to compile iloader a few times. At this point, we theorically don't need iloader anymore since we can just manually compile our payloads and stash those directly to their proper addresses in the disk image. However, doing this blindly like that will certainely results in a lot of bootloops before everything works as expected. To save a lot of debugging time and test the whole thing, iloader has a mechanism that copies our compiled ARM payloads (nettoyeur and exploitation shellcode) bytes directly in its running memory at their proper base address. For this, we must obviously compile our payloads first. To write nettoyeur code, a tool called kdumper allows us to dump a runtime iBoot for eventually compare it against it's original image to extract the differences.
So, for a basic setup, we must at least compile four things.- iloader (Mach-O executable)
- kdumper (Mach-O executable)
- nettoyeur (armv7)
- iboot_p1.S (armv7)
Let's start with iloader, this is the hardest piece of code to compile there. Once compiled, we obtain a Mach-O executable that is intended to be run at userland level, like kloader for example. Compiling iloader isn't obvious, we must use an old iOS 4.3 SDK for a reason that I don't know exactly. There's also a few additional arguments that we must provide to gcc in order to compile everything the right way. The iOS 4.3 SDK is bundled with Xcode 3.2.6, which sounds like quite old software. This version was normally supported with MacOS X Snow Leopard (10.6.4) somewhat like back in 2011. Who says old stuff on newer operating system usually says issues, plus Xcode is quite an heavy piece of software especially those old builds that were installed on the OS through an installer. I do not recommand running those old Xcode installers, since I remember I got a bootloop on my Mac after doing this. Instead, we will extract the stuff we need from those installer packages and manually setup our toolchain. It's portable and far less risky for newer MacOS sytems.
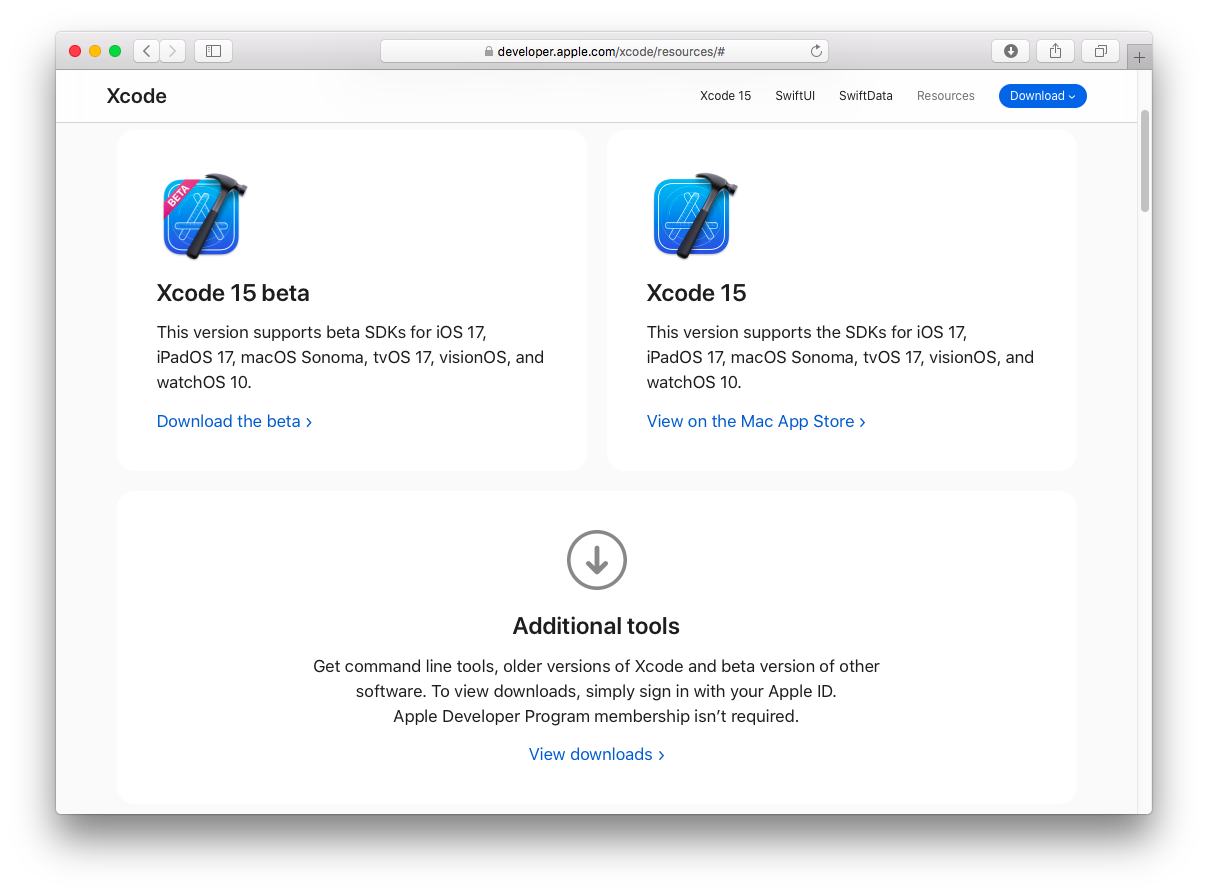
To begin, go to Xcode resources page on the Apple Developer website here, https://developer.apple.com/xcode/resources/. Then, go down to additional tools and click on view downloads.
Filter for "xcode" and go down to find the package we need, it is called "Xcode 3.2.6 and iOS SDK 4.3 for Snow Leopard".
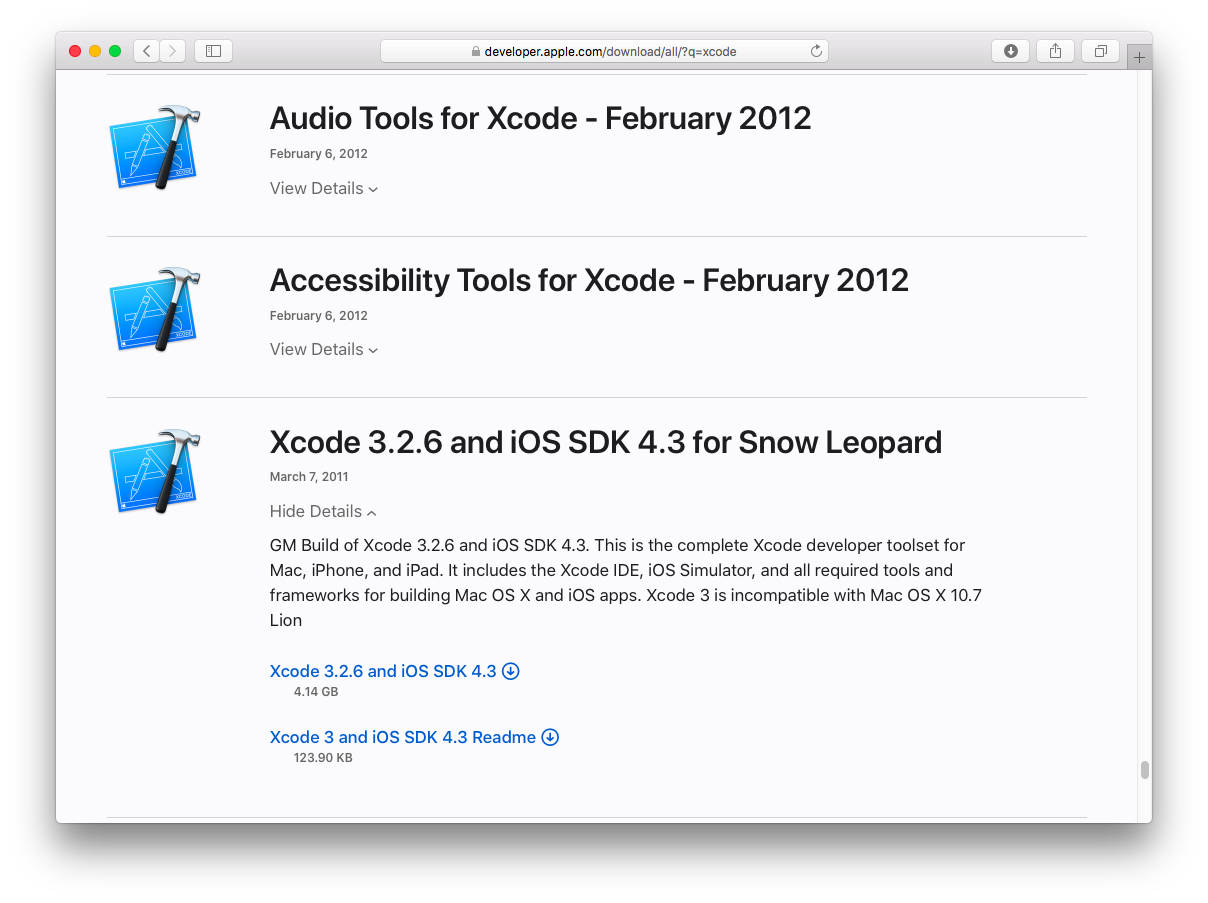 Download the disk image, it's a bit more than 4 GB in size. Save the file to your "De Rebus Antiquis" folder and do a SHA256 of it to verify its integrity.
shasum -a 256 xcode_3.2.6_and_ios_sdk_4.3.dmg
SHA256 = 47f6fecdce63bb00640a9f99c2a65778c1356630286d8003d597ffb83dfcdf3b
Inside your "De Rebus Antiquis" work folder, create that hierarchy.
- compilers
- packages
- gcc
Now, mount xcode_3.2.6_and_ios_sdk_4.3.dmg and use command line to go into the packages repository.
cd /Volumes/Xcode and iOS SDK/Packages
List files of that repository.ls
ApplicationLoader.pkg
BluetoothSDK.pkg
CHUD.pkg
CoreAudioSDK.pkg
Dashcode.pkg
DevDocumentation.pkg
DevSDK.pkg
DevSamples.pkg
DevToolsDocumentation.pkg
DeveloperDiskImage4_3.pkg
DeveloperDiskImageReleased.pkg
DeveloperTools.pkg
DeveloperToolsCLI.pkg
DeveloperToolsSystemSupport.pkg
DistributedBuildsSupport.pkg
DocDownloadOff.pkg
DocDownloadOn.pkg
FireWireSDK.pkg
InstallerTools.pkg
JavaSDK.pkg
MacOSX10.4.Universal.pkg
MacOSX10.5.pkg
MacOSX10.6.pkg
MacOSXSupportPlugin.pkg
MobileDevice.pkg
OpenGLApps.pkg
OpenGLSDK.pkg
OtherDevDocumentation.pkg
QuickTimeSDK.pkg
RelocatableScript.pkg
SystemScript.pkg
VersionedDeveloperToolsSystemSupport.pkg
WebKitSDK.pkg
X11Documentation.pkg
X11SDK.pkg
Xcode_MacOSX10.6_Extras.pkg
clang.pkg
gcc4.0.pkg
gcc4.0ADCDocs.pkg
gcc4.2.pkg
gcc4.2ADCDocs.pkg
iPhoneDocumentation.pkg
iPhoneHostSideTools.pkg
iPhoneSDK3_0.pkg
iPhoneSDK3_1.pkg
iPhoneSDK3_1_2.pkg
iPhoneSDK3_1_3.pkg
iPhoneSDK3_2.pkg
iPhoneSDK4_0.pkg
iPhoneSDK4_1.pkg
iPhoneSDK4_2.pkg
iPhoneSDK4_3.pkg
iPhoneSDKSnowLeopardExtras.pkg
iPhoneSDKTools.pkg
iPhoneSimulatorSDK3_2.pkg
iPhoneSimulatorSDK4_0.pkg
iPhoneSimulatorSDK4_1.pkg
iPhoneSimulatorSDK4_2.pkg
iPhoneSimulatorSDK4_3.pkg
iPhoneSimulatorSDKTools.pkg
iPhoneSystemComponents.pkg
llvm-gcc4.2.pkg
xcrun.pkg
Copy gcc4.2.pkg, iPhoneSDKTools.pkg and iPhoneSDK4_3.pkg to the [De Rebus Antiquis]/compilers/packages/ folder using the "cp" command.
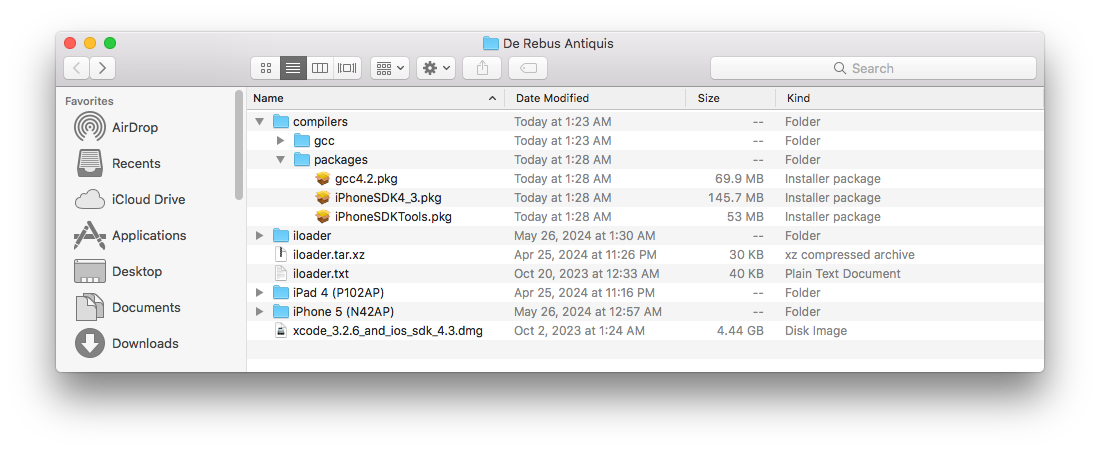
Extract those three packages using MacOS X built-in utility "pkgutil".
The first one is the GNU Compiler Collection (GCC).pkgutil --expand-full [De Rebus Antiquis]/compilers/packages/gcc4.2.pkg [De Rebus Antiquis]/compilers/packages/gcc4.2
Second one is clang+LLVM.pkgutil --expand-full [De Rebus Antiquis]/compilers/packages/iPhoneSDKTools.pkg [De Rebus Antiquis]/compilers/packages/iPhoneSDKTools
Finally, the iOS 4.3 SDK is also required.pkgutil --expand-full [De Rebus Antiquis]/compilers/packages/iPhoneSDK4_3.pkg [De Rebus Antiquis]/compilers/packages/iPhoneSDK4_3
One folder for each extraction should be created with the same name as the corresponding .pkg file under the "packages" folder. We have to move the payload from each of those package to our gcc folder under the [De Rebus Antiquis]/compilers one. Let's do gcc4.2 first, this is our toolchain base.
mv [De Rebus Antiquis]/compilers/packages/gcc4.2/Payload/usr/ [De Rebus Antiquis]/compilers/gcc/
Only gcc 4.2 isn't enough to build iOS executables, we have to merge LLVM binaries from the iPhoneSDKTools package.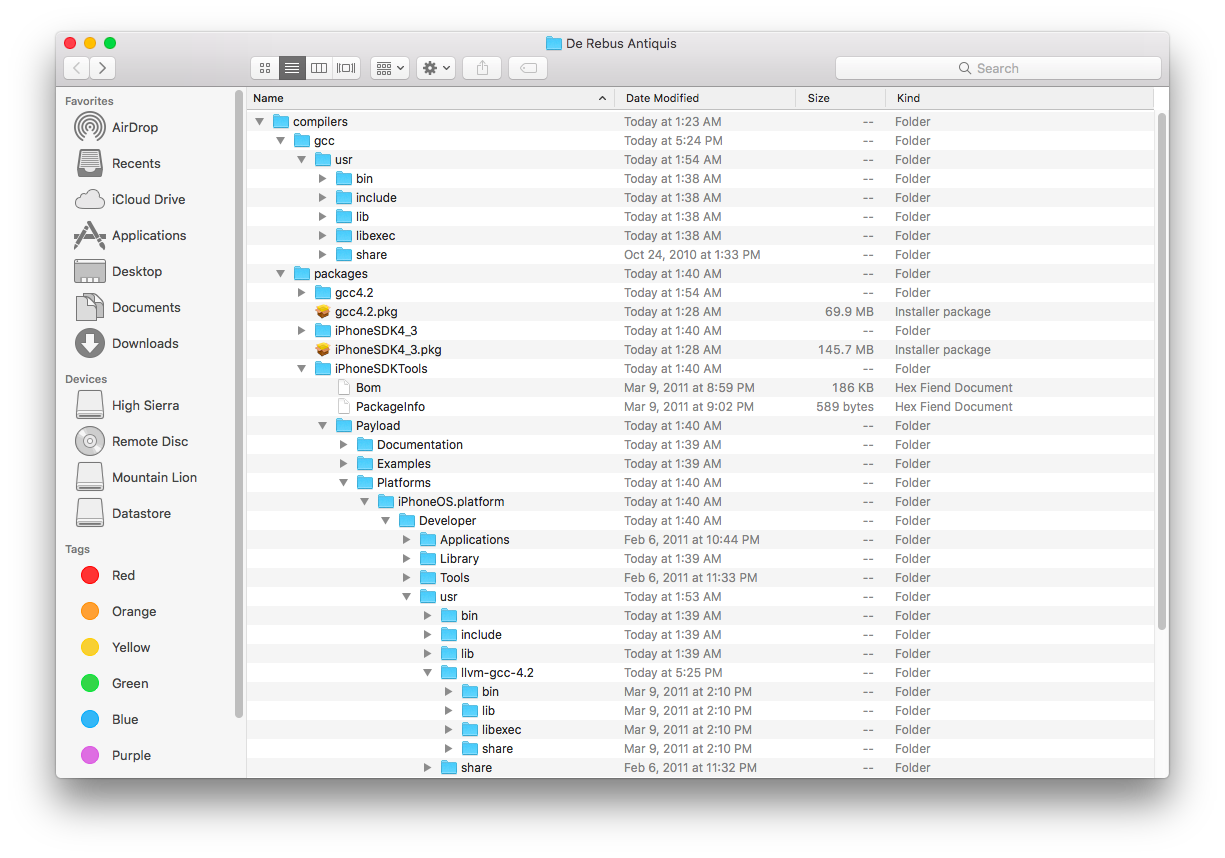
We can find llvm-gcc-4.2 binaries under [De Rebus Antiquis]/compilers/packages/iPhoneSDKTools/Payload/Platforms/iPhoneOS.platform/Developer/usr/llvm-gcc-4.2, we have to merge all of those with what's already in the [De Rebus Antiquis]/compilers/gcc/bin folder hierarchy. Note that we must do a smart merge because some files with the same name exists in both packages but aren't the same binaries. Do the merge exactly like this.
llvm-gcc-4.2/bin/arm-apple-darwin10-llvm-g++-4.2 -> gcc/usr/bin/
llvm-gcc-4.2/bin/arm-apple-darwin10-llvm-gcc-4.2 -> gcc/usr/bin/bin/arm-apple-darwin10-llvm-gcc-4.2.1
llvm-gcc-4.2/llvm-c++-4.2 -> gcc/usr/bin/
llvm-gcc-4.2/llvm-cpp-4.2 -> gcc/usr/bin/
llvm-gcc-4.2/llvm-g++-4.2 -> gcc/usr/bin/
llvm-gcc-4.2/llvm-gcc-4.2 -> gcc/usr/bin/

llvm-gcc-4.2/lib/gcc/arm-apple-darwin10 -> gcc/lib/gcc/

llvm-gcc-4.2/libexec/gcc/arm-apple-darwin10 -> gcc/libexec/gcc/
llvm-gcc-4.2/libexec/gcc/libllvmgcc.dylib -> gcc/libexec/gcc/
Those compilers packages (gcc4.2 and LLVM) has support files for i686 and powerpc. We don't need that for iOS, so those files can be deleted from our gcc folder.
gcc/usr/bin/i686-apple-darwin10-cpp-4.2.1
gcc/usr/bin/i686-apple-darwin10-g++-4.2.1
gcc/usr/bin/i686-apple-darwin10-gcc-4.2.1

gcc/usr/bin/powerpc-apple-darwin10-cpp-4.2.1
gcc/usr/bin/powerpc-apple-darwin10-g++-4.2.1
gcc/usr/bin/powerpc-apple-darwin10-gcc-4.2.1

gcc/usr/lib/gcc/i686-apple-darwin10
gcc/usr/lib/gcc/powerpc-apple-darwin10

gcc/usr/lib/i686-apple-darwin10
gcc/usr/lib/powerpc-apple-darwin10

gcc/usr/libexec/gcc/i686-apple-darwin10
gcc/usr/libexec/gcc/powerpc-apple-darwin10
Note, you can also clear i686 and powerpc stuff from gcc/usr/share/man/man1/, those are help files.
The iOS 4.3 SDK is required to compile iloader, take the Payload folder from our extracted package from []/De Rebus Antiquis/compilers/iPhoneSDK4_3 in and move it to []/De Rebus Antiquis/compilers/sdk. Then, rename the Paylaod folder to iPhoneSDK4.3.sdk
Finally, your compilation toolchain files and folder hierarchy should looks like this.
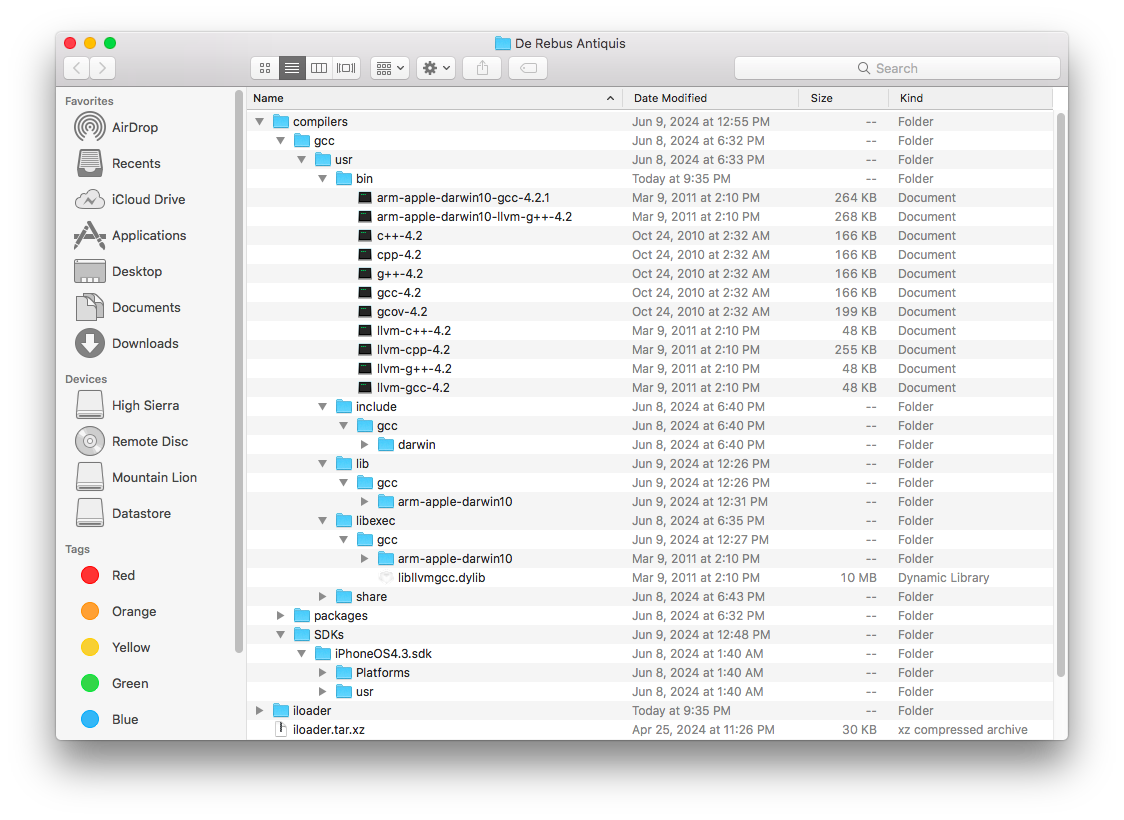
We are now ready to try that, rename the original iloader executable to iloader.bak (backup) in []/De Rebus Antiquis/iloader/, and go to that folder using terminal.
Change current directory to []/De Rebus Antiquis/iloader, then invoke gcc-4.2 to rebuild iloader.
[]/De Rebus Antiquis/compilers/gcc/usr/bin/gcc-4.2 -isysroot /Users/pmbonneau/Desktop/iPhoneSDK4_3/Platforms/iPhoneOS.platform/Developer/SDKs/iPhoneOS4.3.sdk -dead_strip -o iloader -Wall -W -pedantic -O2 -DUSE_SIGNAL=2 -Wno-long-long iloader.c lzss.c -arch armv7 -mthumb
Here is a summary of used compiler flags:
- -isysroot : iOS SDK path
- -dead_strip : Remove orphan functions and data.
- -o : Output file
- -Wall : Enable all compiler's warning messages (Warning all)
- -W : ?
- -pedantic : Try to enforce standards compliance.
- -O2 : Most commonly used optimization flag
- -DUSE_SIGNAL=2 : This defines the macro "USE_SIGNAL" to value 2. It's like a variable that is set by the compiler at compile time. This is used to do debugging with iloader.
- -Wno-long-long : Ignore warnings for long long type.
- -arch : Specifies the architecture to use, in this case, armv7 for 32-bit iOS devices.
- -mthumb : Use the ARM thumb instruction set.
See here for useful GCC options.
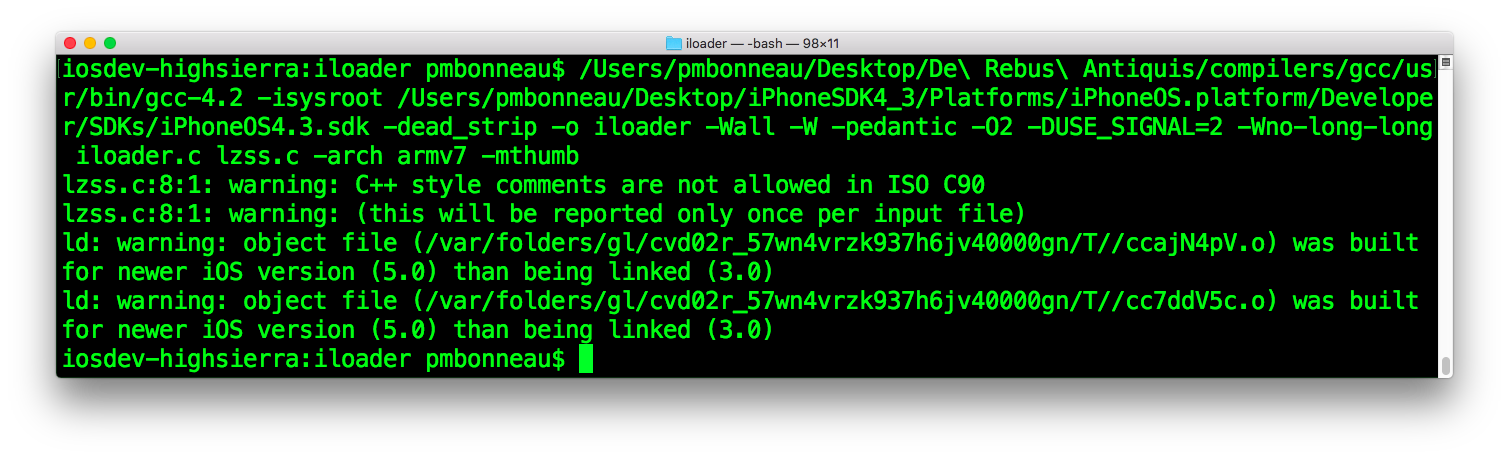
Since we have used the -Wall flag, the compiler will return a lot of warning messages. Those can be safely ignored only if they looks like the ones in the screenshot above. If everything goes as expected with the compilation, you should get a 51 kb iloader executable. Note that our compiled executable is like 2.5 times heavier in size than Xerub's one (around 19 kb). I don't know why, but my guess is he might has used different compiler settings or flags that optimize the compilation much better. Anyway, use the SCP command to transfert this freshly compiled iloader executable into your device, overwriting the one we previously transfered.
- []/De Rebus Antiquis/iloader/iloader -> /iloader/iloader
Use terminal to SSH into your iOS device, upload the newly compiled iloader renamed as iloader_compiled and run it.
./iloader_compiled
If iloader has been properly compiled, you should get the same results as previously with Xerub's built. Only one thing might differ, the relocation address. In the previous run, it was 0x4a0000, now it is 0x600000.
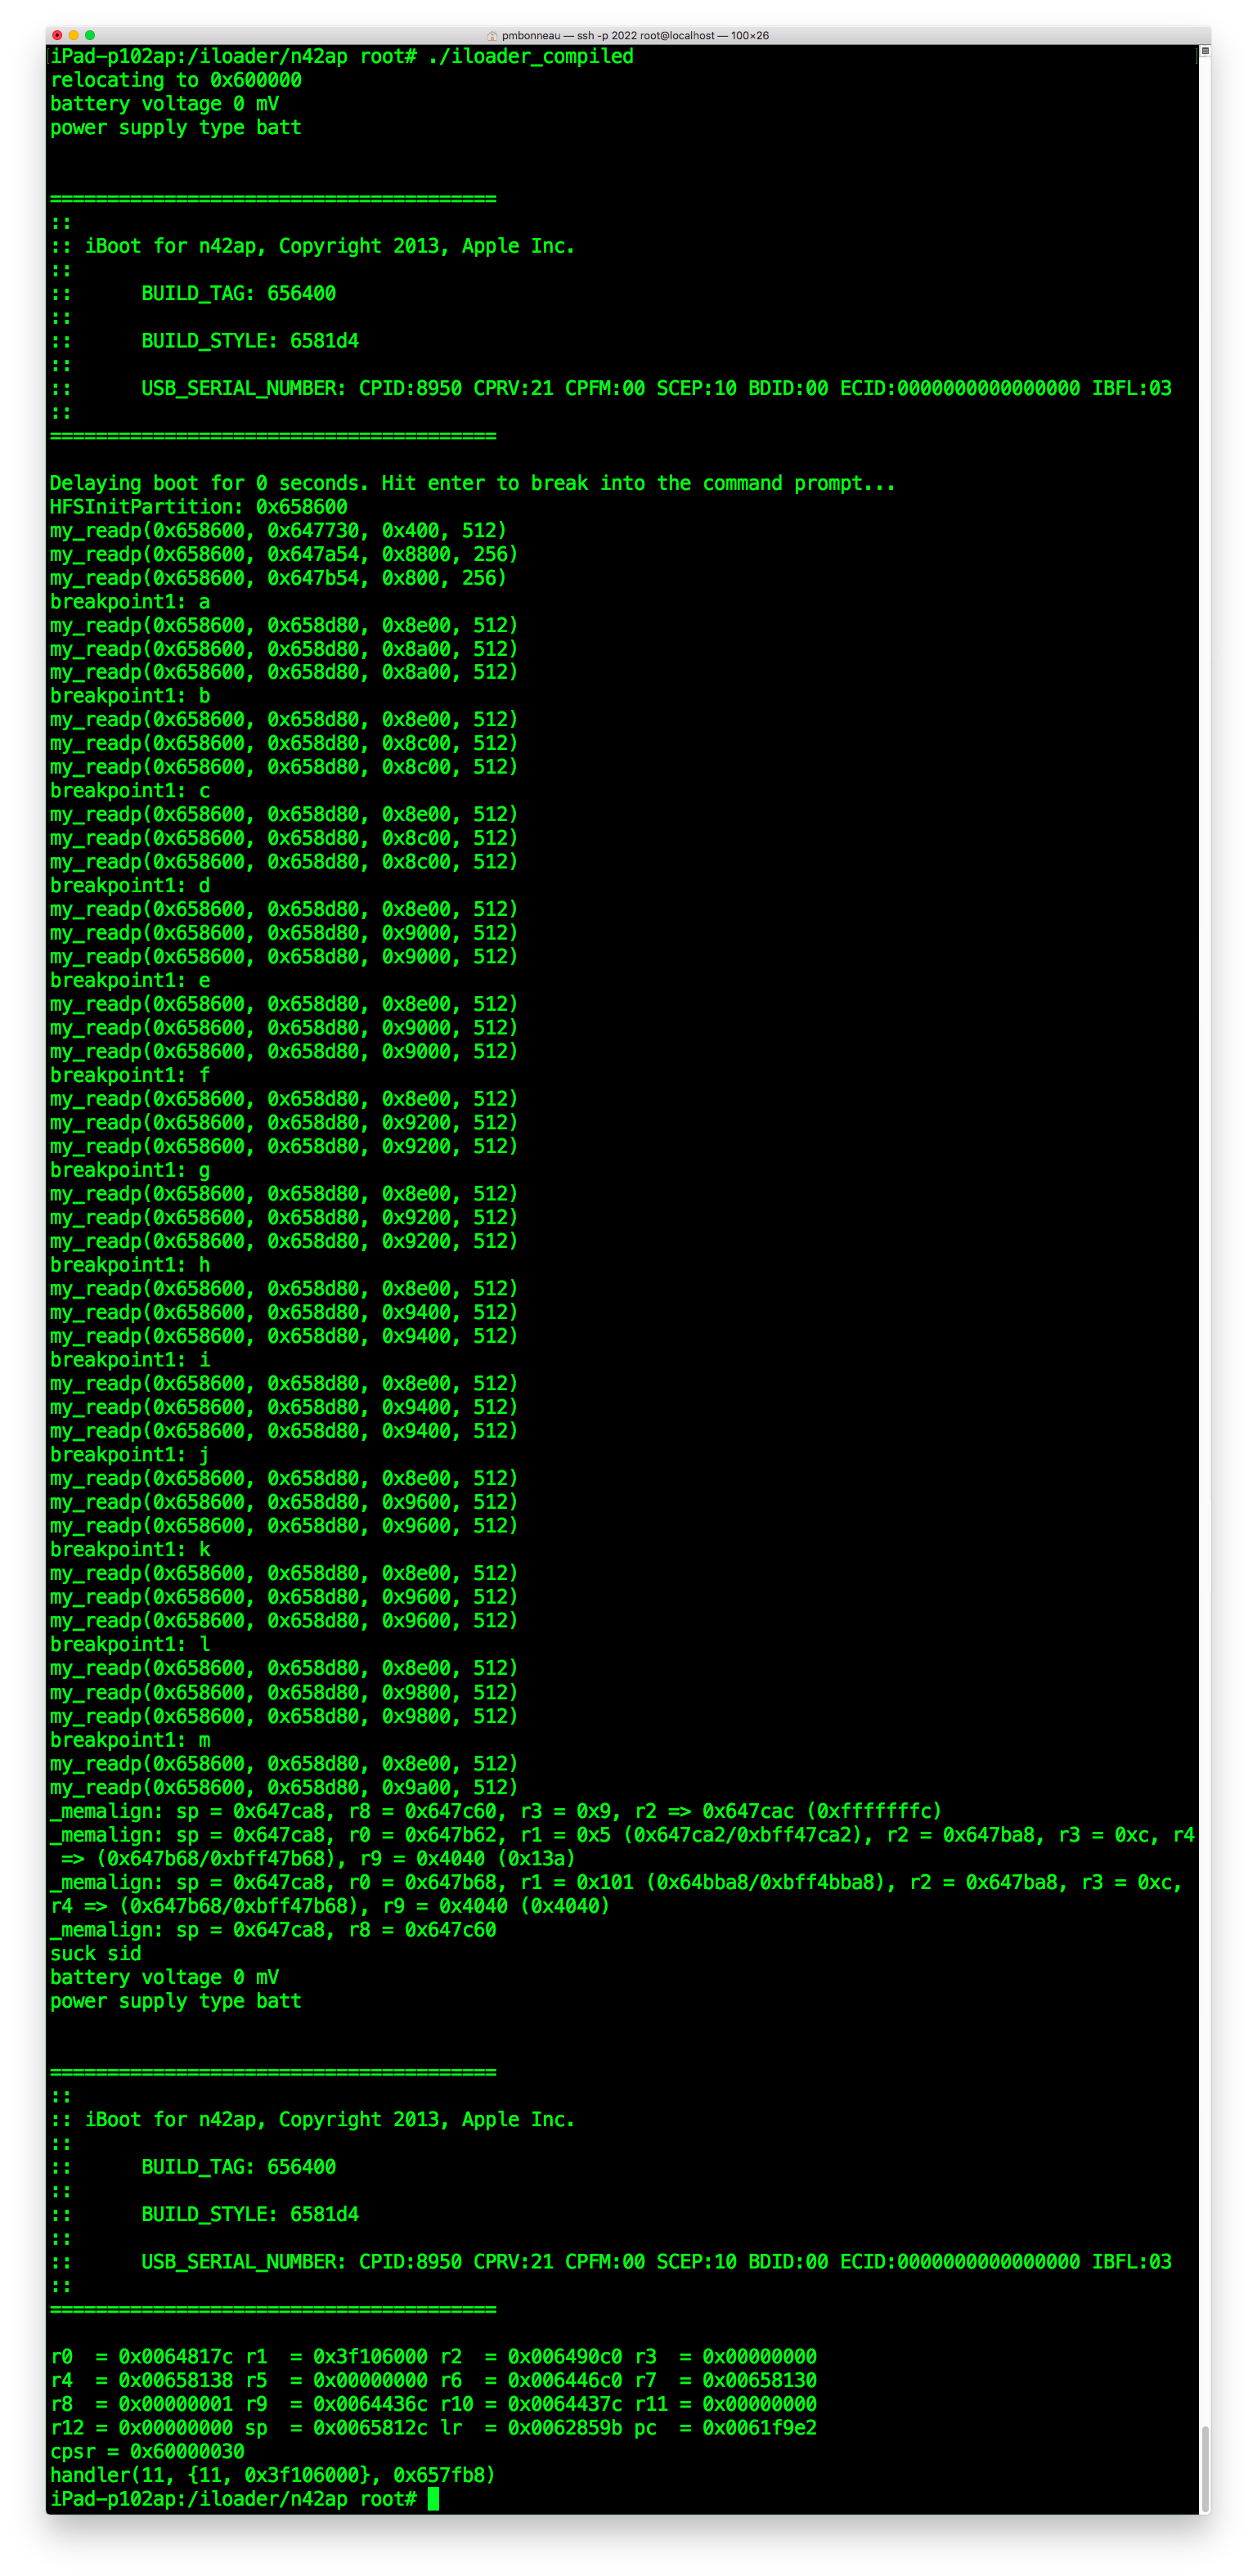
We are done with iloader, now let's try compile the post-exploitation payloads, exploit shellcode and nettoyeur.
- iboot_p1.S
- nettoyeur.c
Those are intended to run at iBoot level, so they must be compiled in plain ARM. To compile source code that way, we must setup the ARM toolchain. Note that iboot_p1.S is written in ARMv7 thumb while nettoyeur.c is in C, but this is not an issue since the toolchain usually handles well both languages. The reason of why two different languages is still a mistery for me, but my guess is that C is more friendly for a piece of code such as nettoyeur.c that only consists of store operations.
Another thing to consider is that a compiled binary output might differ among compiler versions, which could affect us since we are relying on the size of that output in order to fit this in a restricted memory available space. For nettoyeur.c, I noticed that arm-none-eabi-gcc from latest ARM toolchain produce a different binary than the sample one provided in the iloader bundle Xerub compiled for us. One ARM toolchain version I could find that produces the desired result is v4.8.2-14, which has been released somewhat around 2015. It is obsolete since a few years, so I had some difficulties to find reliable installation packages for this particular version. A way I found to get those was to setup a Ubuntu 14.04.6 (Trusty Tahr) virtual machine and install arm-gcc-nonce-eabi directly from official Ubuntu repositories.
Download the Ubuntu 14.04.6 (Trusty Tahr) 32-bit OS installation image from here. It's best to install this into a virtual machine that you run on your MacOS host for more convinience. You can use any hypervisor software you want, but one I particulary recommand is Oracle VirtualBox.
Create a new virtual machine with the following specifications.
- Suggested VM name : Ubuntu 14 LTS - ARM Toolchain
- CPU : 1
- Type : Ubuntu (32-bit)
- RAM : 1024 Mb
- vRAM : 64 Mb
- Hard Disk (SATA) : 8.0 Gb
- Optical drive (SATA) : ubuntu-14.04.6-desktop-i386.iso
- Network Adapter : Depending of your physical network, use bridged or NAT
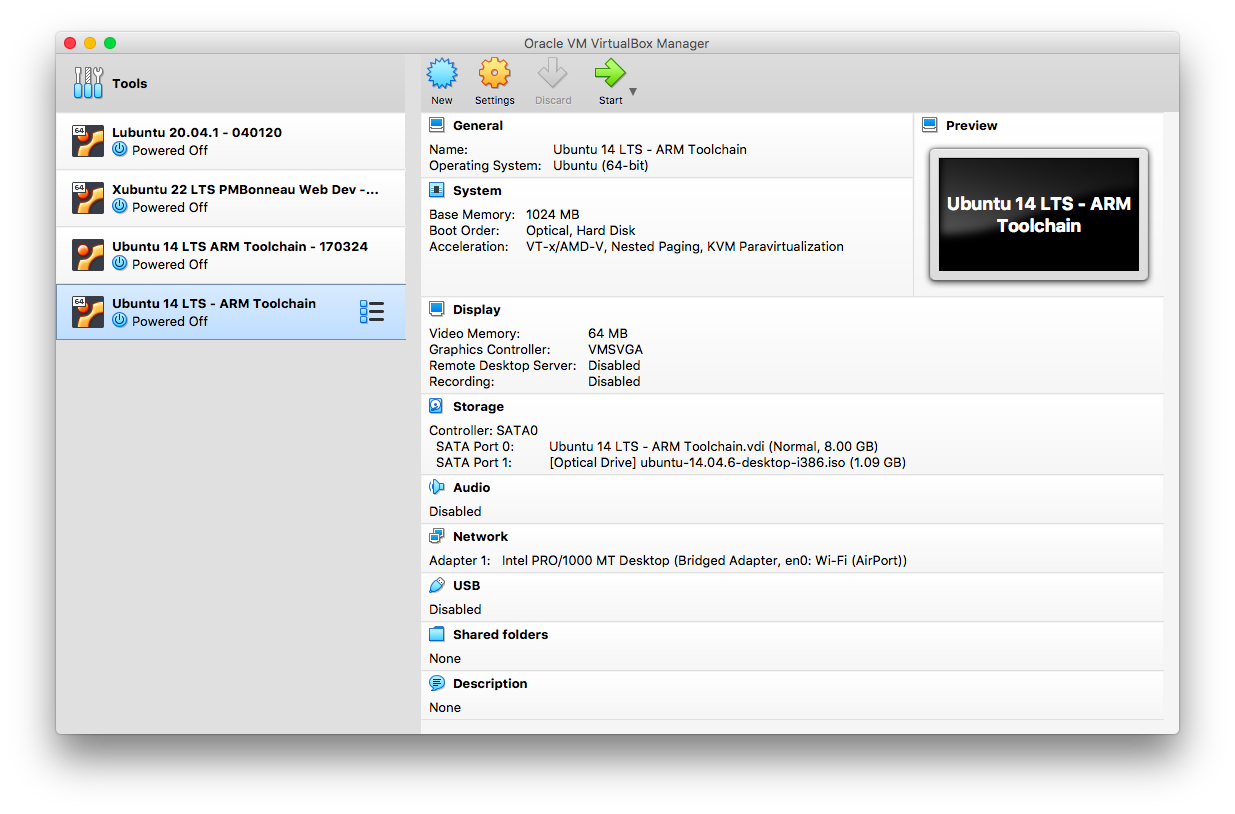
Start the virtual machine, and run the Ubuntu setup wizard to install the OS on the 8 Gb virtual hard disk. Please note that Ubuntu installation process will not be documented here in this writeup since there are many tutorial online for this purpose. Once it is installed, empty the virtual optical drive then boot the OS from hard disk.
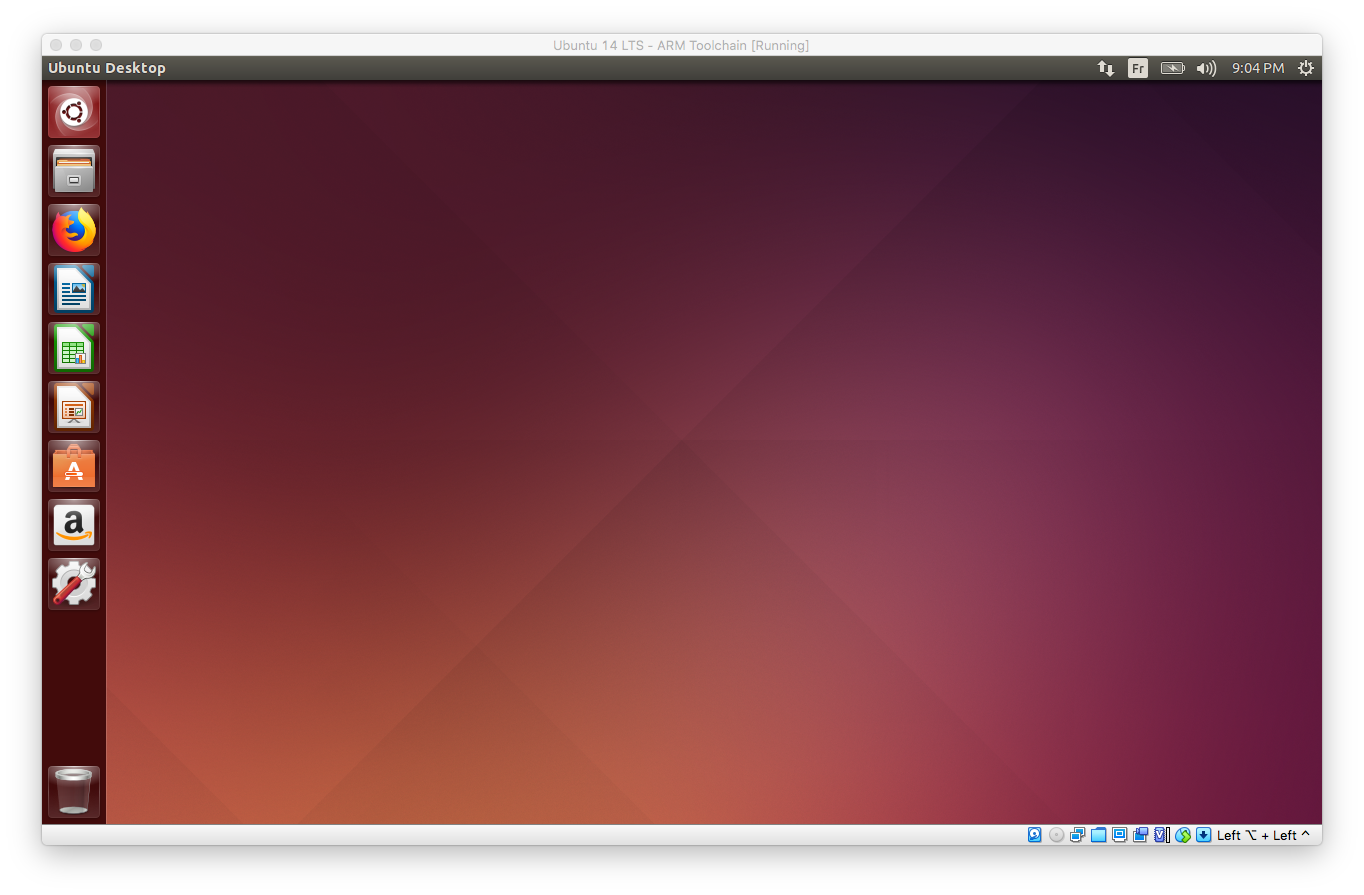
For more convinience, we will share our entire iloader folder with the Ubuntu virtual machine to compile payloads without repeatly moving files between host and guest. In order to do this, we need to install VirtualBox guest additions on the virtual machine and choose a folder to share from the host. Once the newly installed Ubuntu system is booted, apply all available updates using the GUI software updater or apt commands apt-get update and apt-get upgrade. Once the system is rebooted after updates, mount the VirtualBox guest additions media and run the VBoxLinuxAdditions.run script using sudo.
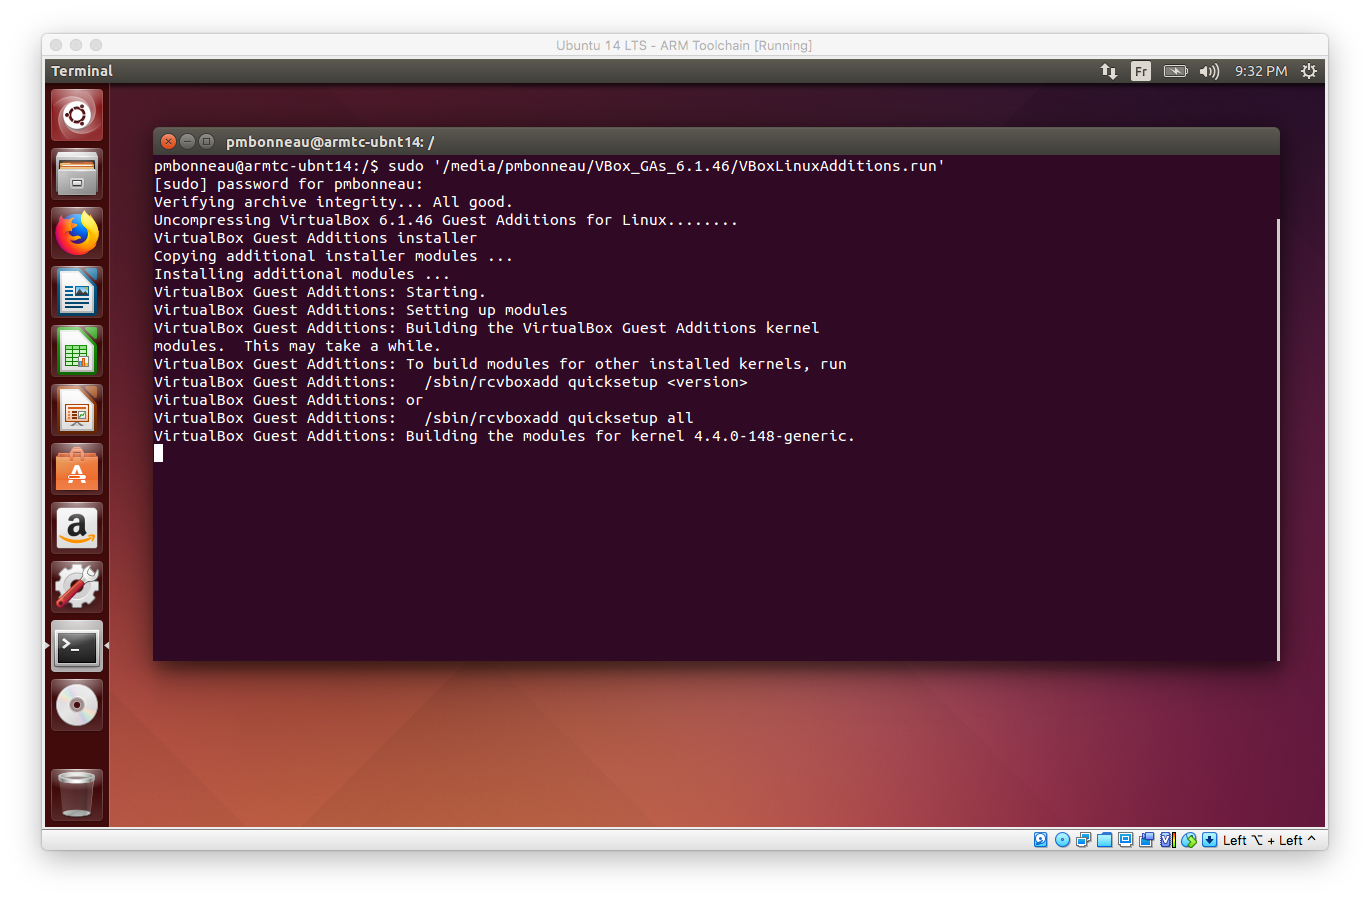
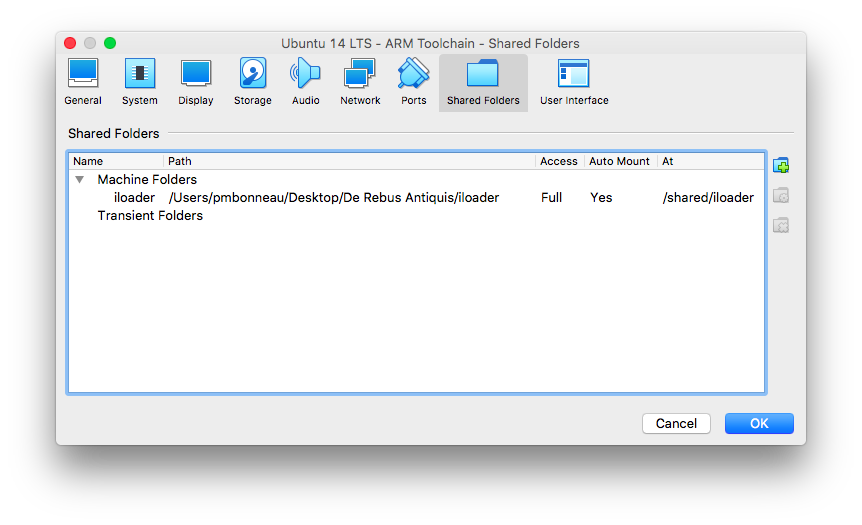
After the guest additions installation, shutdown the system. In the virtual machine settings, add a shared folder named iloader this way.
You will need your current user UID and GID to mount the shared folder with proper permissions in order to avoid working as root. You can find those in the /etc/passwd file. My user UID and GID are both set to 1000 by default on my Ubuntu system.
As root, create the /shared/iloader folder structure. Then, run the following command to mount the shared iloader folder to /shared/iloader.
mount.vboxsf -o uid=1000,gid=1000 iloader /shared/iloader
Note : Manually mounting the shared folder should be only required for special use cases, or a temporary test. I would recommand a permanent setup as explained below.
You may want the shared folder to be automatically mounted with correct permissions at system boot, VirtualBox guest additions has an automount feature for this purpose. Shared folders will be mounted automatically if "Auto Mount" is checked in the virtual machine shared folder settings. There is a user group that manages the shared folder permissions named "vboxsf", which is created when the guest additions are installed. If you want to access shared folders using a non-root user, you will have to add that user to the "vboxsf" group. Otherwise, only root will have permissions to access the shares.
usermod -a -G vboxsf pmbonneau
Reboot, then test shared folder permissions. Try to open files, create and delete. If this is working as expected, it means the shared folder setup between your host and the virtual machine is functionnal.
Let's install the ARM toolchain. There is gcc-arm-none-eabi v4.8.2 available directly in Ubuntu 14.04 repositories, it can be installed easily with the system package manager.
apt-get install gcc-arm-none-eabi
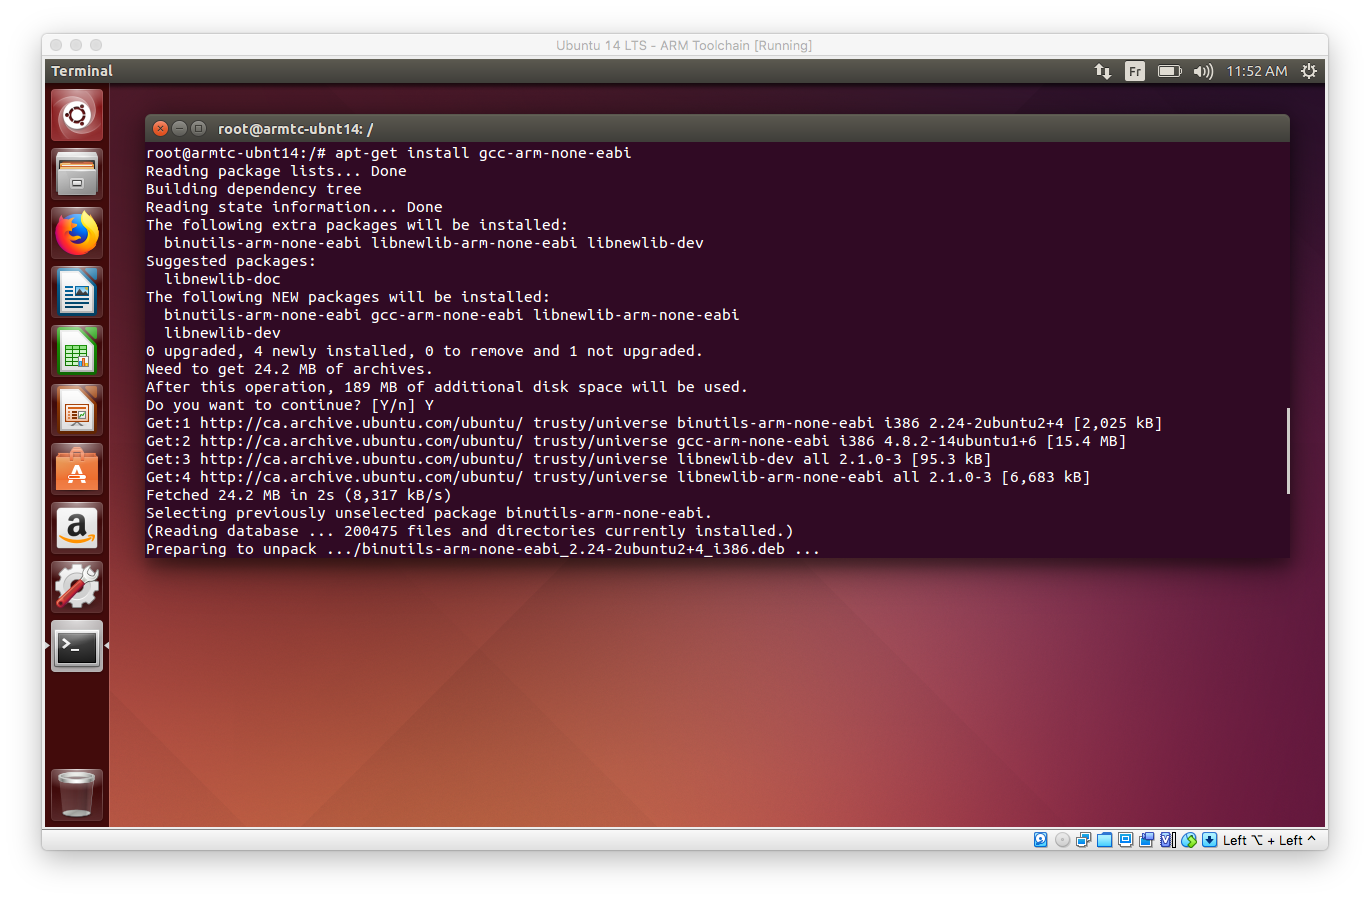
Check gcc-arm-none-eabi installed version, it should be gcc version 4.8.2.
arm-none-eabi-gcc -v
Let's try to compile nettoyeur.c to see if our arm toolchain produces the same binary than the one Xerub compiled for us. Navigate to /shared/iloader/iPhone5,2/11B554a/work/netto/, then run those two commands to compile nettoyeur.
arm-none-eabi-gcc -c -Os nettoyeur.c -o nettoyeur_test.o
arm-none-eabi-objcopy -O binary nettoyeur_test.o nettoyeur_test.bin
Compare nettoyeur_test.bin with nettoyeur.bin, both files must be identical.
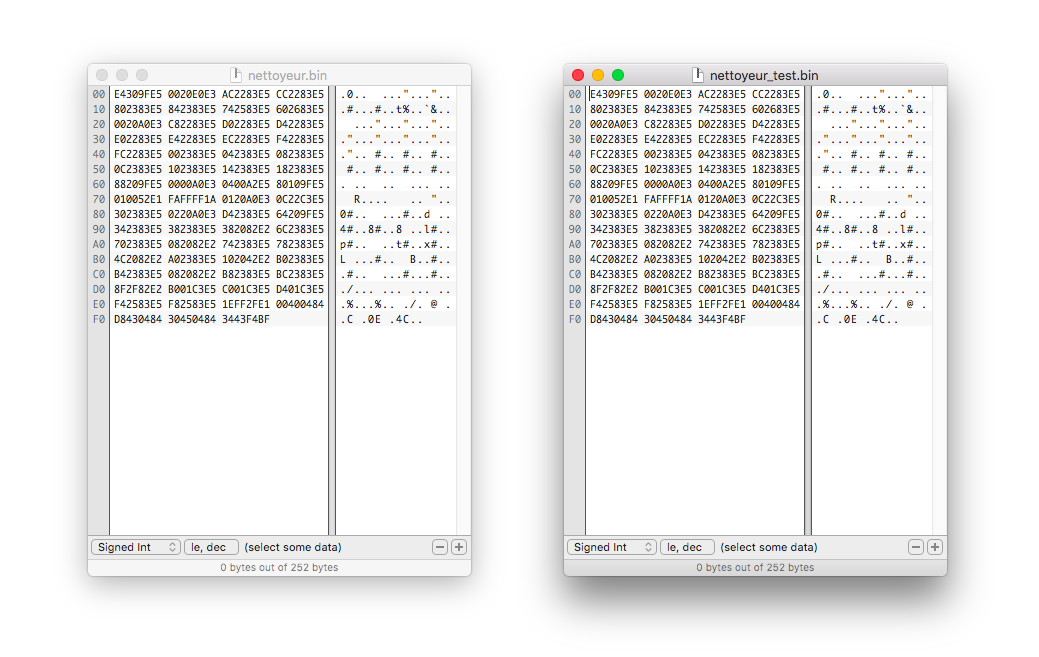
Compare nettoyeur_test.bin with nettoyeur.bin, both files must be identical.
Let's try to compile iboot_p1.S, the main shellcode that runs once we get code execution on iBoot. Go to /shared/iloader/iPhone5,2/11B554a/work/stub/, then run those two commands to compile.
arm-none-eabi-as -c -Os iboot_p1.S -o iboot_p1_test.o
arm-none-eabi-objcopy -O binary iboot_p1_test.o iboot_p1_test.bin
Compare iboot_p1_test.o with iboot_p1.o, both files must also be identical.
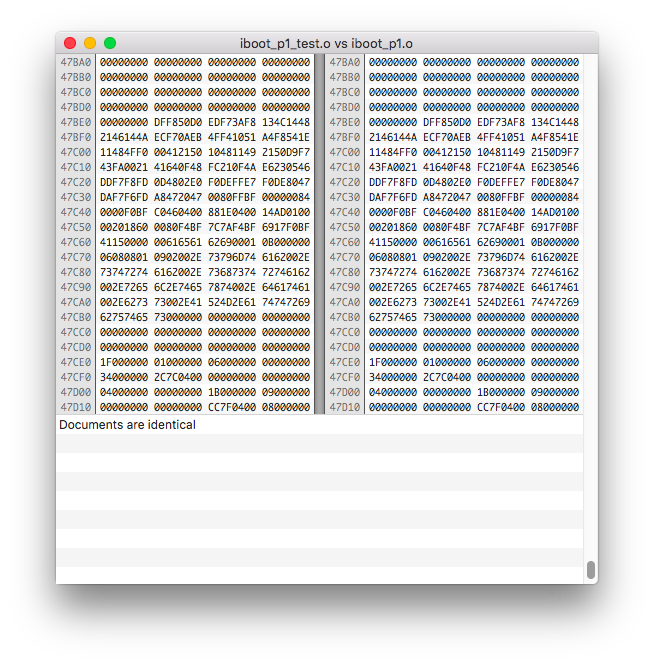
We won't compare iboot_p1_test.bin, since we don't have a standalone compiled binary there. We could compare it with the compiled shellcode that resides in ramdiskF.dmg, however, it would not be identical since there's some changes made by iloader for the exploit.