Downgrade back to a vulnerable firmware
The latest firmware available for iPad 4th (P102AP) is iOS 10.3.4, which comes with a fixed iBoot. We will downgrade back our device to iOS 7.0.4 using SHSH blobs to get back a vulnerable signed iBoot installed on the device.
Apple basically protects iOS restore process using secure boot which involves SHSH blobs, just like for the regular iOS boot process. On iOS 5.x and newer, a ticket validation has been added to the restore process. So, it is normally not possible to just replay properly signed blobs and directly start a restore. In order to get around this, we have to patch that ticket check in the bootloader. Patching means breaking the integrity, something signature checks don't like at all. This means, we also have to patch an important part of the restore bootchain, at least from SecureROM to iBEC (secondary stage). The minimum we can do is to get iBEC patched to kickstart the restore process, but getting there requires the previous boot components to be patched for signature checks as well...
First, extract the iOS 7.0.4 .ipsw firmware file. Those .ipsw files are basically .zip archives, you can either rename the extension or extract directly using MacOS built-in Archive Utility.
Once everything is extracted, go to the Firmware directory, then to the dfu one. ./[Extracted .ipsw file]/Firmware/dfu/
You should see iBSS.p102ap.RELEASE.dfu and iBEC.p102ap.RELEASE.dfu, which are bootloaders used for the restore mode. Now, we have to decrypt those two bootloader images using xpwntool with proper keys we can find quickly on TheAppleWiki. If you use @axi0mx ipwndfu tools, you could also manually decrypt images KBAGs using checkm8 BootROM exploit and device GID key.
xpwntool [encrypted .img3 file] [decrypted output .img3 file] -iv [IV] -k [KEY]
We won't use the -decrypt flag, since we will need to get decrypted files unpacked from their IMG3 container in order to use them with iBoot32Patcher. Decrypt the iBSS image using xpwntool.xpwntool iBSS.p102ap.RELEASE.dfu iBSS.p102ap.RELEASE_dec.bin -iv e43fa203ca26afe289f33e7490e29966 -k 4aed51d00a75741608c331e9cc060cc1a3c0ce1b227253f36a8576ba95d9fb7a
Proceed the same way with the iBEC image.xpwntool iBEC.p102ap.RELEASE.dfu iBEC.p102ap.RELEASE_dec.bin -iv d651dfa8ae83a3ac85ddb9c27321a080 -k b1f6dffd7f40fb0ffffc0be35358840f16fad0702ed98002c106f4427fa0566e
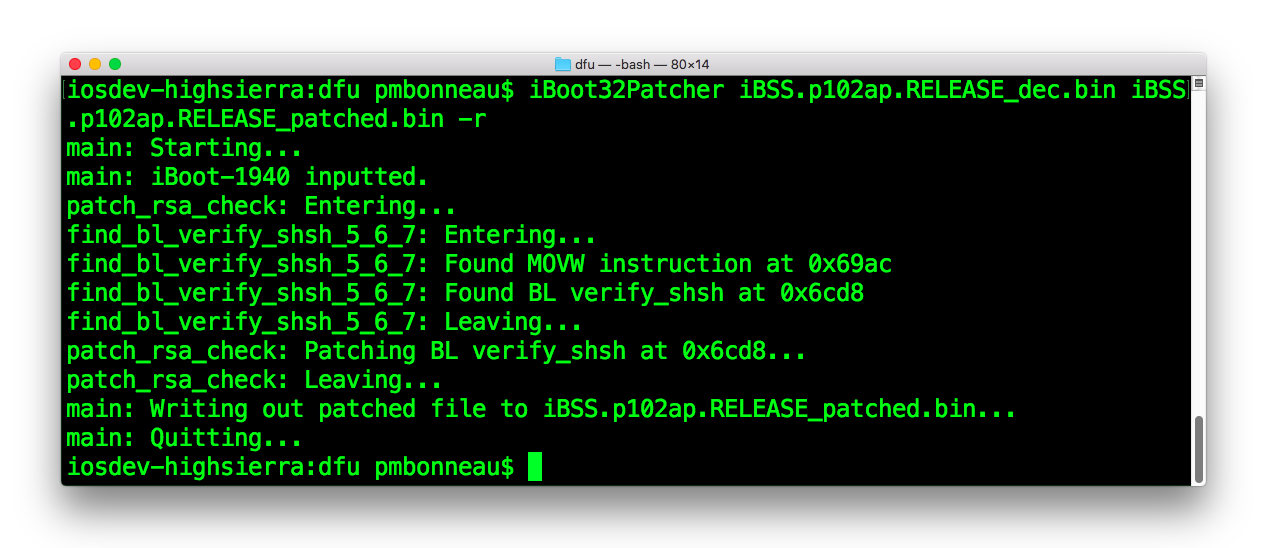
Verify that both images were properly decrypted. To do this, just open them with a hex editor and look for the boot banner string. If you can see the boot banner in clear text, images are properly decrypted. We are now ready to patch images, let's use @nyan_satan's fork of iH8Sn0w's iBoot32Patcher to patch signature check on iBSS.
iBoot32Patcher iBSS.p102ap.RELEASE_dec.bin iBSS.p102ap.RELEASE_patched.bin -r
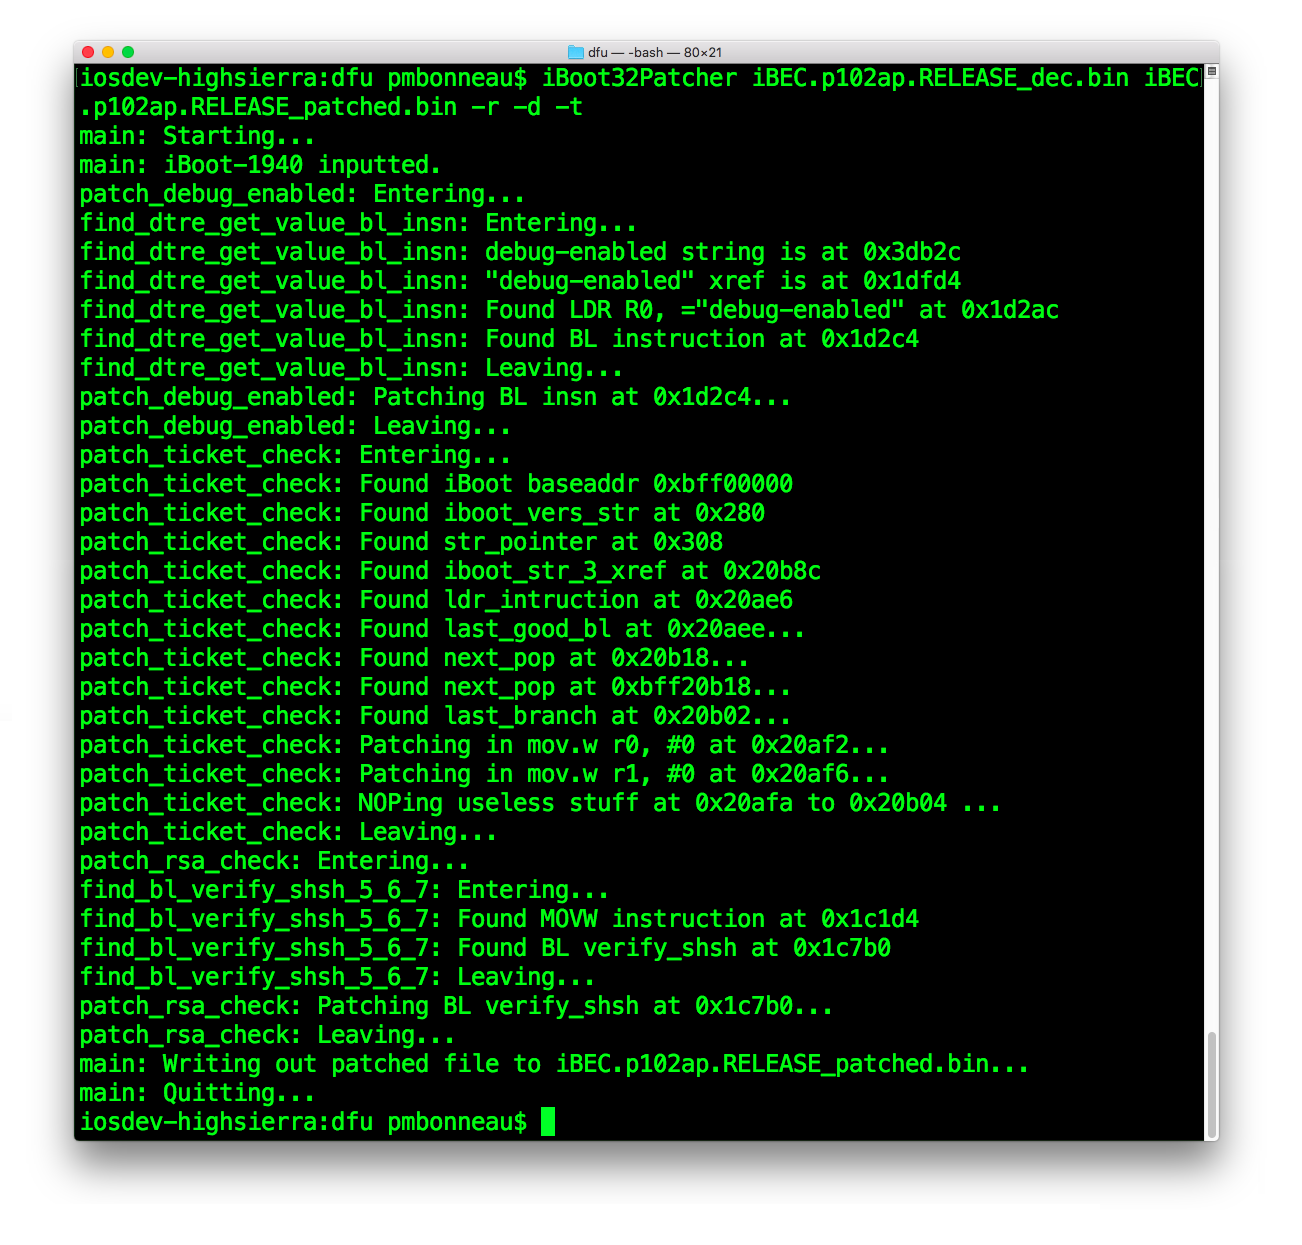
 Next, use iBoot32Patcher to apply signature check, ticket and debug_enabled patches on iBEC.
iBoot32Patcher iBEC.p102ap.RELEASE_dec.bin iBEC.p102ap.RELEASE_patched.bin -r -d -t
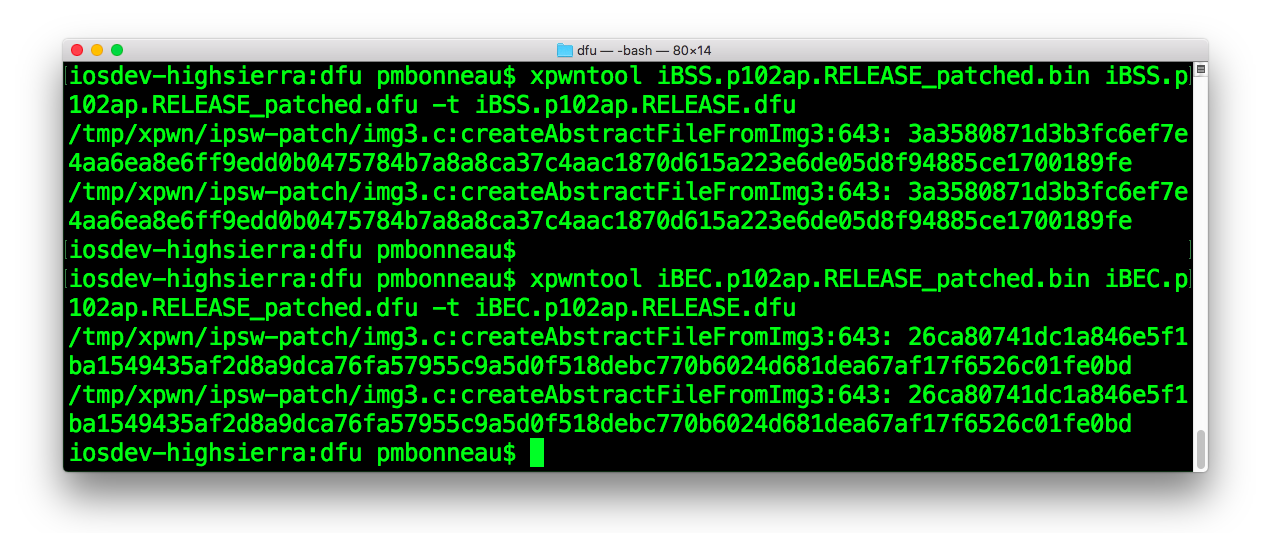
 Use xpwntool to repack patched images into an IMG3 container, using the original image within its container as template.
xpwntool [patched image file] [output .img3 file] -t [encrypted original .img3 file]
The -t option allows "copying" the IMG3 container of an image and apply it to a new image. An alternative of this could be recreating the container from scratch using @Winocm's img3maker.xpwntool iBSS.p102ap.RELEASE_patched.bin iBSS.p102ap.RELEASE_patched.dfu -t iBSS.p102ap.RELEASE.dfu
Do the same thing with the iBEC image.xpwntool iBEC.p102ap.RELEASE_patched.bin iBEC.p102ap.RELEASE_patched.dfu -t iBEC.p102ap.RELEASE.dfu
 Now, you should have all those files in the dfu directory.
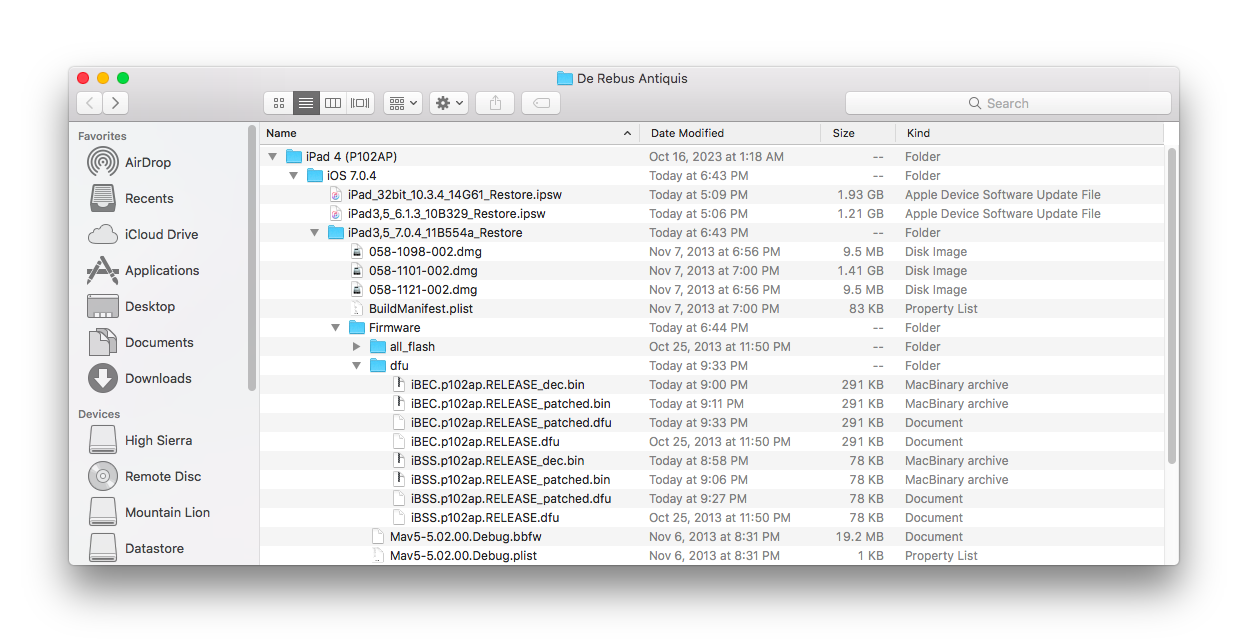 Replace original files by their patched version. To do this, simply rename the files.
iBSS :
iBSS.p102ap.RELEASE.dfu -> iBSS.p102ap.RELEASE_original.dfu
iBSS.p102ap.RELEASE_patched.dfu -> iBSS.p102ap.RELEASE.dfu
iBEC :
iBEC.p102ap.RELEASE.dfu -> iBEC.p102ap.RELEASE_original.dfu
iBEC.p102ap.RELEASE_patched.dfu -> iBEC.p102ap.RELEASE.dfu
Replace original files by their patched version. To do this, simply rename the files.
iBSS :
iBSS.p102ap.RELEASE.dfu -> iBSS.p102ap.RELEASE_original.dfu
iBSS.p102ap.RELEASE_patched.dfu -> iBSS.p102ap.RELEASE.dfu
iBEC :
iBEC.p102ap.RELEASE.dfu -> iBEC.p102ap.RELEASE_original.dfu
iBEC.p102ap.RELEASE_patched.dfu -> iBEC.p102ap.RELEASE.dfu
We are done with patching the DFU bootloaders. Before re-packing the .ipsw, let's add additional images to flash in the nand_firmware. I will not go in detail about this process since I've already described it in my iOS 5.x HFS+ heap buffer overflow writeup here.
Basically, we do the following steps.
- Verify that images to flash are decrypted and packed into an img3 container with a different tag than stock ones (ex. "logb" instead of "logo" for a bootlogo image).
- Carefully rename those additional images with a similar name than their original sibling and with a letter identifier, such as "applelogoB.img3" or "DeviceTreeB.img3" and put them in ./[Extracted .ipsw file]/Firmware/all_flash/all_flash.k94.production
- Append new images file name to the manifest file, located in ./[Extracted .ipsw file]/Firmware/all_flash/all_flash.k94.production/manifest
- Be careful with the size of additional images, because nand_firmware has a very limited capacity and if it gets busted, weird things might happen during the boot process.
Finally, repack the .ipsw file. I suggest to keep all the intermediate iBSS and iBEC files we created earlier in case we have to do some adjustements. The restore process will ignore them and only use the ones that have their stock name. Go to the root of the extracted original .ipsw file, ./iPad3,5_7.0.4_11B554a_Restore/ and compress all the files in a .zip archive. You can use MacOS built-in Archive Utility.
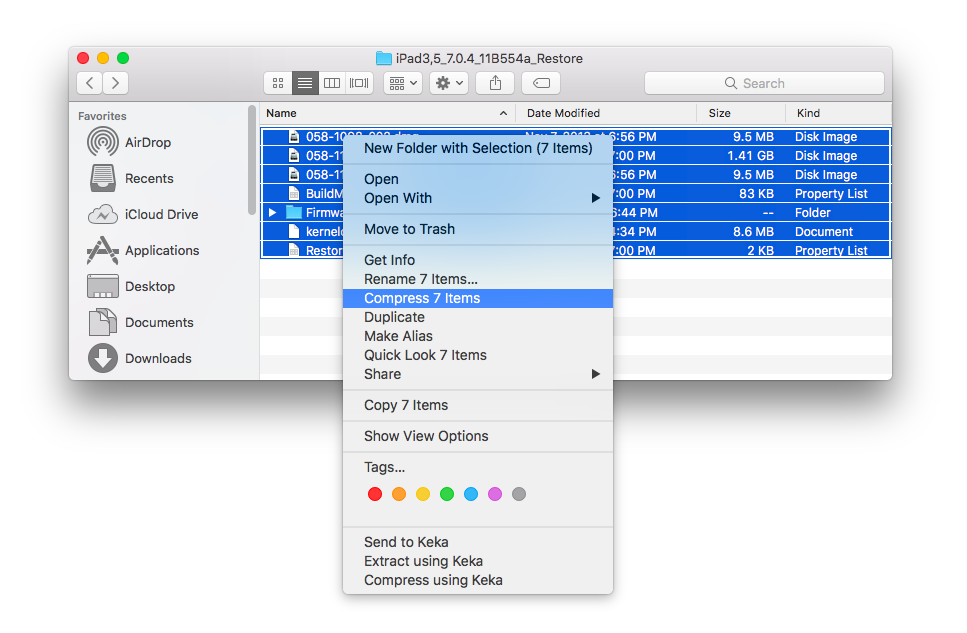 Rename the newly created Archive.zip to iPad3,5_7.0.4_11B554a_Downgrade.ipsw, with "Downgrade" in the name to differentiate from the original firmware.
It's now time to restore that downgrade custom firmware! We will use iDevice(Re)Restore for the operation. It's a fork of iDeviceRestore, which I find less buggy for downgrades and it can also restore the latest baseband for cellular devices. To use it, we must at least boot device to an unsigned iBEC.
We usually have two possibilities to acheive this on iPad 4.
- Jailbreak iOS 10.3.4 using h3lix (RC6) jailbreak from @Tihmstar, then boot patched iBSS using kloader and go to iBEC using iRecovery.
- Use checkm8 to put device directly in patched DFU mode first, then boot patched iBSS using pwnedDFU and go to iBEC using iRecovery.
However, the first one which uses kloader will mostly fails because core boot components such as kernelcache and devicetree remain encrypted in the .ipsw and they can't be decrypted while restoring since GID key is disabled. If you decrypt those, the restore process might complete successfully, but you will get a bootloop once device reboots at the end because decrypting a image that is intended to be encrypted will fails signature checks. The Odysseus downgrade method creates custom .ipsw firmwares with alternative paths that points to decrypted boot components specially used by the restore process. The original boot components that are intended to be installed as part of the main bootchain are kept untouched, so device is able to boot signed with proper SHSH blobs.
Using terminal, change directory to your iOS 7.0.4 folder, where your downgarde .ipsw is located. You should have named it something like iPad3,5_7.0.4_11B554a_Downgrade.ipsw in order to differentiate it from the stock firmware. I use the checkm8 BootROM exploit to put the iPad directly in patched DFU mode, this will disable signature checks at SecureROM level.
To use checkm8 BootROM exploit, I use the pwnedDFU tool.
pwnedDFU -p
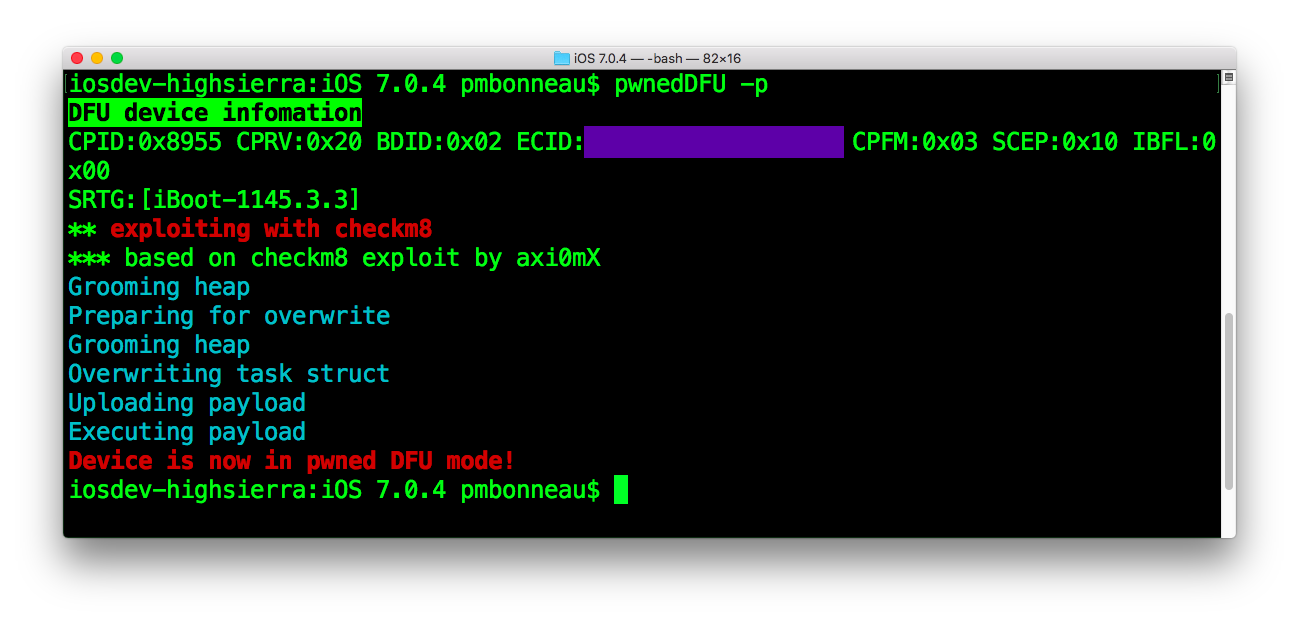 From there, I send the the iBSS we've just patched to build the downgrade firmware, without IMG3 header.
pwnedDFU -f iBSS.p102ap.RELEASE_patched.bin
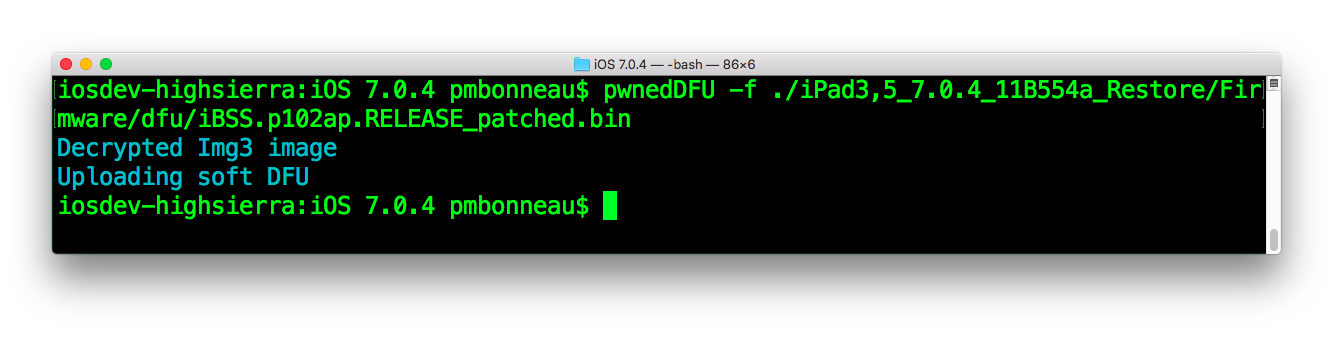 After the iBSS is booted, send it the patched iBEC.p102ap.RELEASE.dfu (with IMG3 header) using iRecovery.
irecovery -f iBEC.p102ap.RELEASE.img3
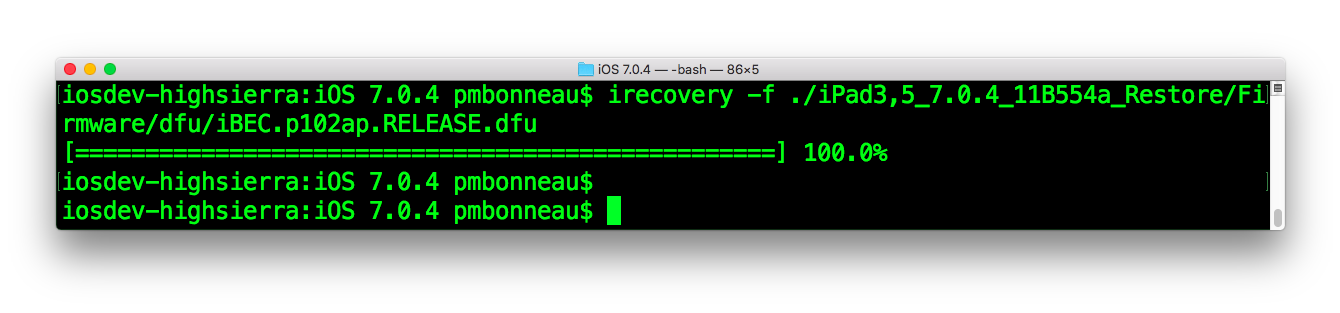 Now, let's run iDeviceReRestore to start the downgrade process. Be sure your iOS 7.0.4 SHSH blobs are in the shsh folder located in your current directory.
idevicererestore -r -d iPad3,5_7.0.4_11B554a_Downgrade.ipsw
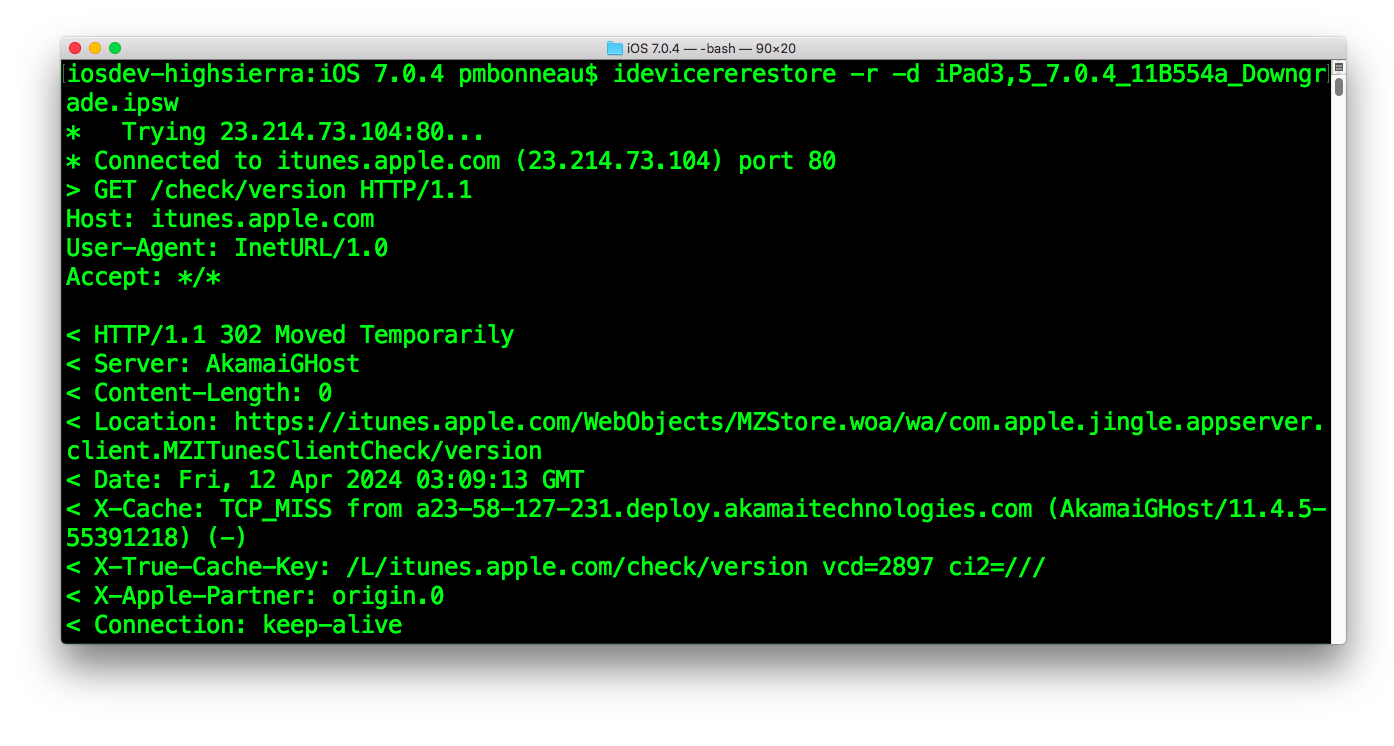 After iDeviceReRestore has extracted the .ipsw, it will boot the patched iBEC image over the same patched iBEC currently running on the device then continue with the restore process.
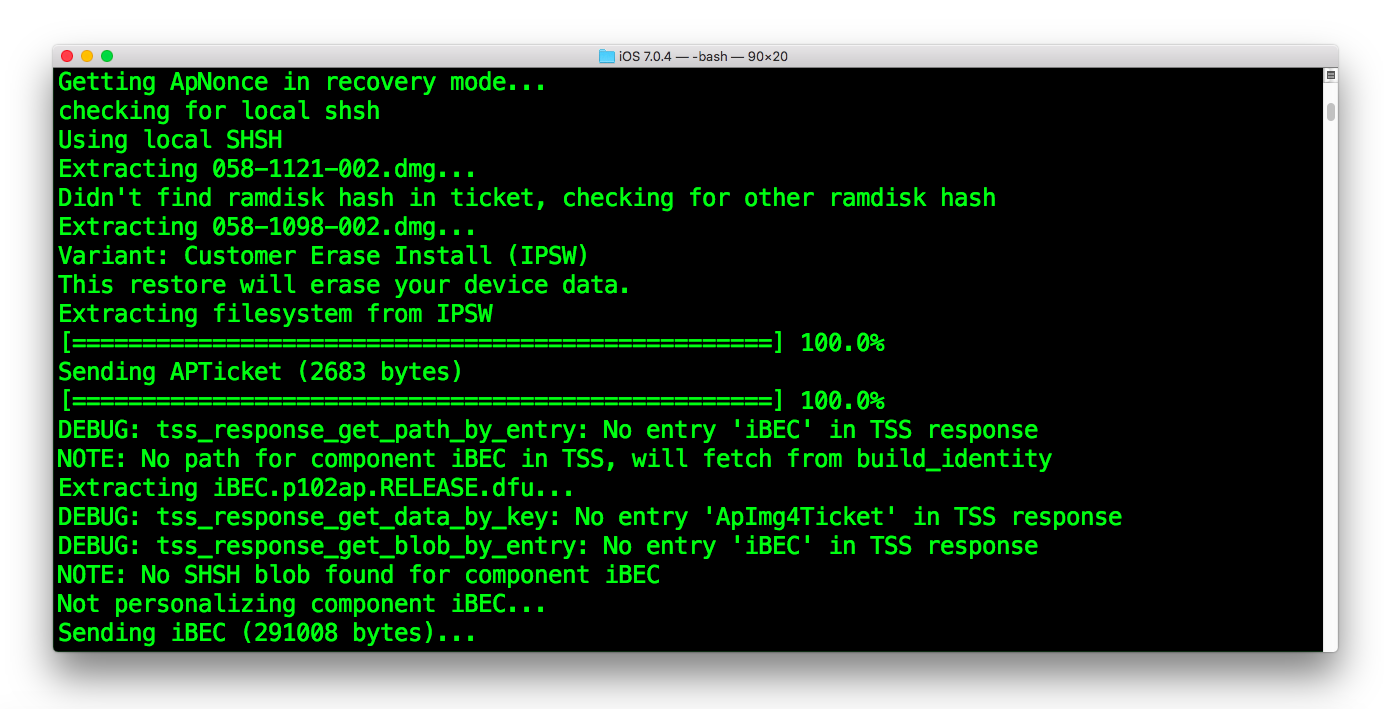
From there, other boot components will be uploaded to device, including boot logo that should be dislayed on the screen shortly after. The Apple logo with the progress bar will appear and the filesystems will be initialized and imaged. After, the restore daemon will flash the nand_firmware, with images listed in the manifest file. This includes any additional custom images if there are any. I have a few custom logos, device tree images and one recovery logo. You should see additional images being flashed there.
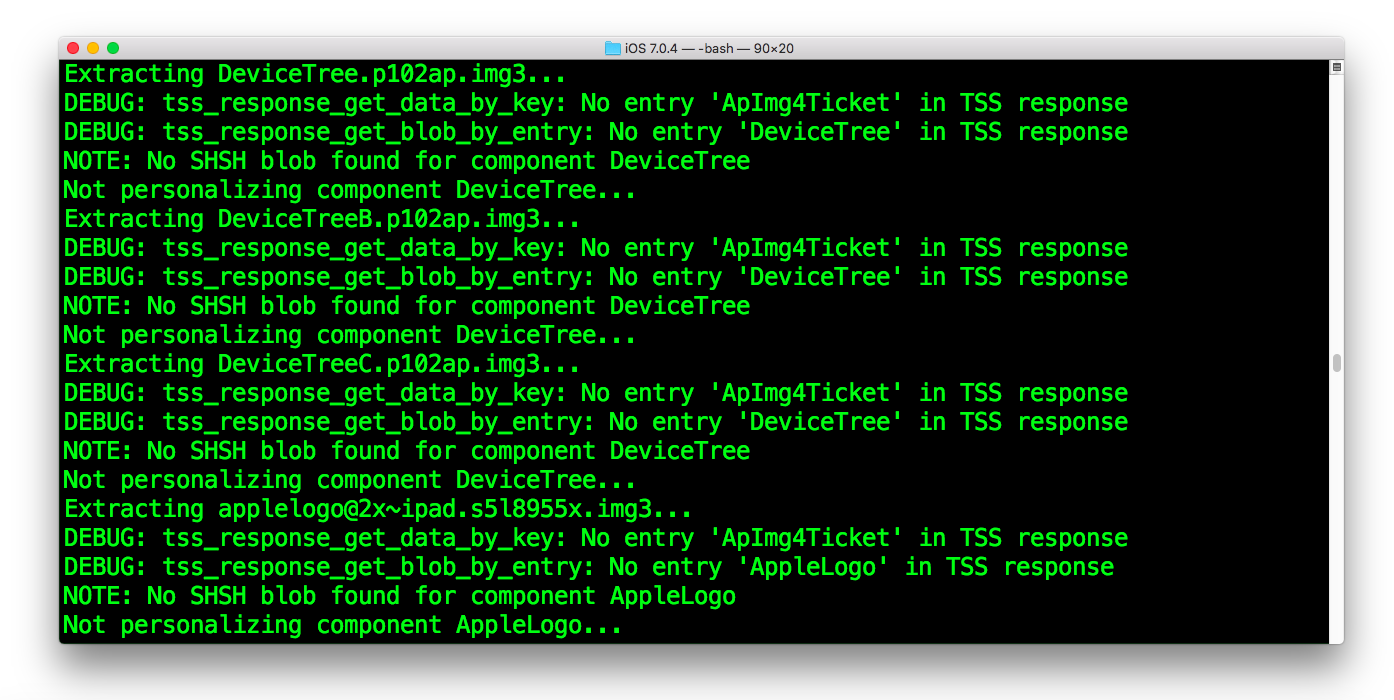 Note, restore process will abruptly fail if there are any fatal issues with additional images being flashed.
The last part of the restore process is to restore the baseband firmware if this is a cellular device. Many restore tools fail at this part because baseband signature validation must be handled differently than the application processor firmware (iOS) and any attempt to flash an unsigned baseband will fail. The idevicererestore tool usually gets the latest signed baseband from Apple and uses it for the downgrade, many older iOS versions will work fine with a newer baseband firmware than the one it was originally shipped with.
If everything looks good, iDeviceReRestore should returns done.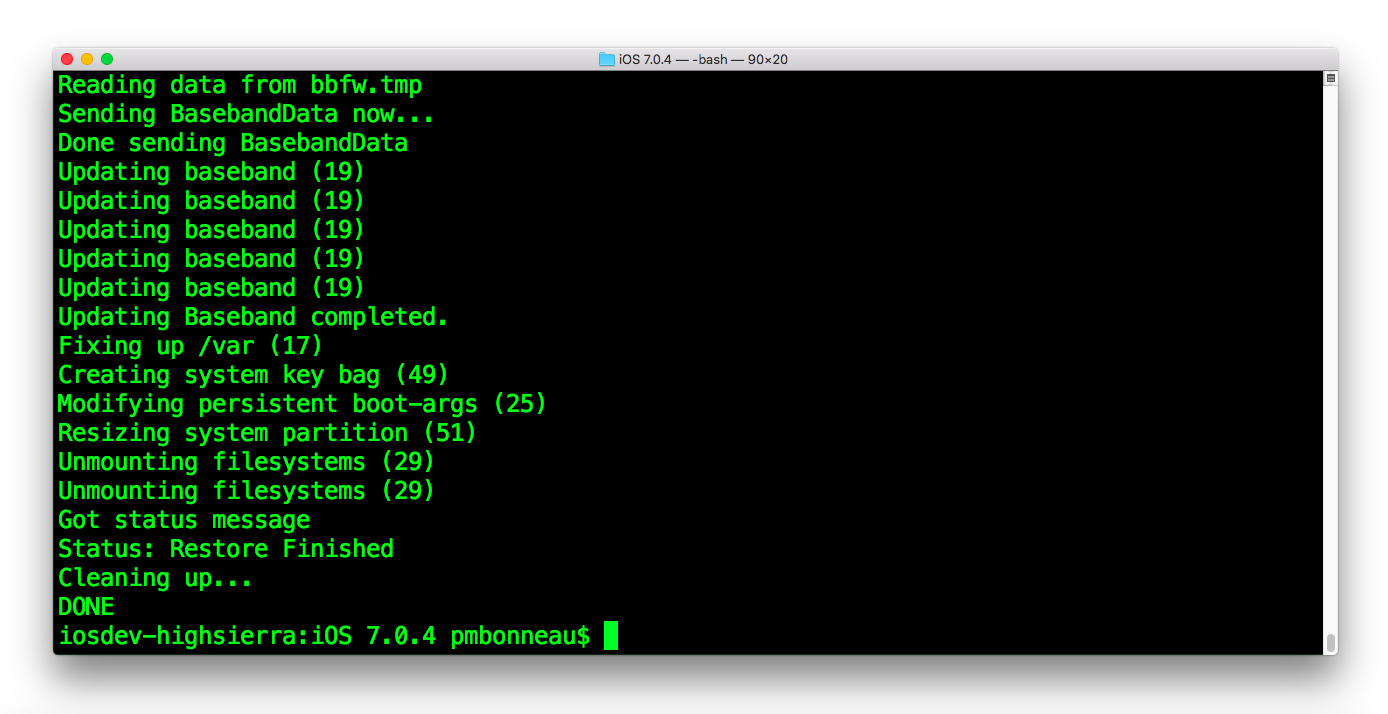 To check that additional images are correctly written to nand_firmware, use a serial cable to look for any weird entries in the image listing output when iBoot runs the find_boot_images() function.
To communicate with the iOS device from serial, you need proper UART drivers for your cable and also a console program. In most cases, UART drivers should be built-in within the operating system. To see if UART drivers for your cable are installed, plug your it into the USB port of your computer then check if you can see the cable device show up in /dev folder.
pmbonneau-mac#ls /dev/ | grep cu.*
If there is no new cu.* device appearing in /dev folder after the cable is plugged, UART drivers for that cable need to be installed. Newer OS X versions seems to have it built-in. For the console program, I suggest you use termz from @Qwertyuiop because the output is very clear.pmbonneau-mac#git clone https://github.com/kpwn/termz.git
pmbonneau-mac#make
To use termz, simply run it with the UART device path of your cable.
pmbonneau-mac#./termz /dev/cu.[UART device ID]
By default, you won't see any serial output from your iOS device because debug-uarts is not enabled. To enable it, do the following.Boot your iOS device in recovery mode (iBoot) by holding home button with serial cable plugged in.
pmbonneau-mac#irecovery -s
irecovery>setenv debug-uarts 3
irecovery>saveenv
irecovery>reboot
Once device is rebooting, you should see iBoot serial output in termz. One of the first thing the bootloader outputs over serial is the listing of nand_firmware images that we need to verify before go further.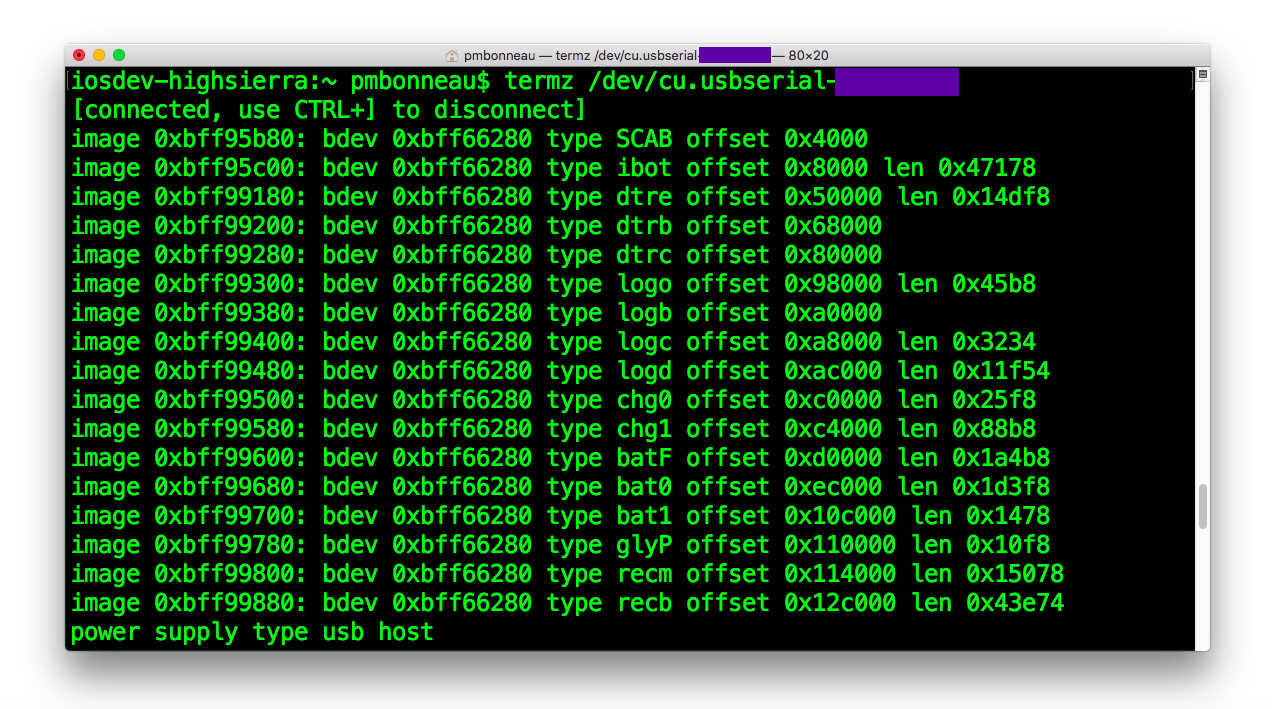
As you can see, there are some missing "len" fields values for custom images. This field value is parsed from IMG3 signature check area (0xC) and it's not relevent when booting usigned as I know. So, many IMG3 packing tools such as Winocm's img3maker just ignore it. Most of the time, image data length value at 0x8 in the IMG3 header is the same as signature check area one, making it possible to just copy both values and get serial output show the proper image length. In the screenshot below, there is a custom boot logo IMG3 that has no signature check area value set at the left, and at the right, the same image but with the proper value set.
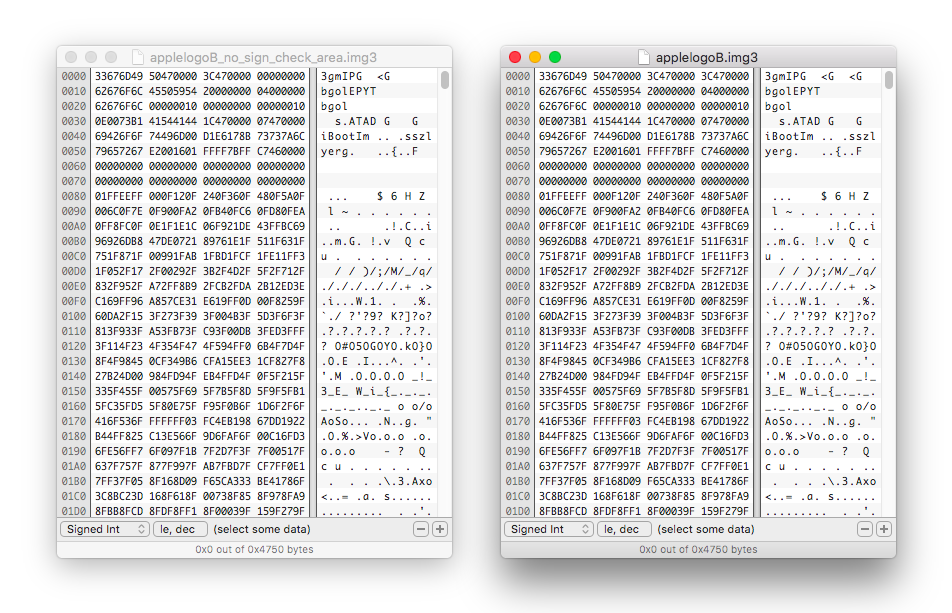 If everything is correct, you should see a complete listing of nand_firmware images through serial.
At this time, your device should be able to boot without any issues to initial setup application. First, verify that the device can read its IMEI number by tapping the circle "?" button at the bottom of the welcome screen. If you see no IMEI, there's something wrong with the baseband at first look. The activation process will help to see if the baseband is properly working. If the device can't activate (stays in an infinite loop) or stuck at "searching..." in the status bar, this is probably because your baseband is corrupted and you will have to fix that issue before go further. Otherwise, if you get to the homescreen, everything looks good and we are ready to proceed with the userland jailbreak.
Congratulations, you device is now downgraded to a firmware that can be potentially used to install any other iOS firmwares released for that device.